
Sending videos through email can sometimes feel like trying to fit a square peg into a round hole. You capture a perfect moment or create a stunning piece of content, but then comes the challenge—file size limitations, compression issues, and compatibility woes. In today’s digital age, video communication is more crucial than ever, whether you’re a content creator, educator, or business owner. But don’t worry; we’re here to guide you through the process with practical solutions and easy-to-follow steps.
This blog post will unravel the complexities of sending large video files via email. From understanding email provider limits to practical tips for compression and cloud storage, we’ve got you covered. Stick around, and by the end, you’ll be a pro at sharing videos effortlessly.
Contents
Email Size Limitations: What You Need to Know
Most popular email services have stringent size limits that can prevent you from sending large video files directly through email. For instance:

- Gmail — 25 MB
- Apple iCloud Mail — 20 MB
- Microsoft Outlook — 20 MB
- Yahoo! Mail — 25 MB
Email providers set these limits to ensure smooth performance and prevent their servers from overloading. Exceeding these limits usually results in the email bouncing back to the sender or being blocked entirely, frustrating both parties involved. Understanding these restrictions allows you to plan accordingly, ensuring your video files are always shareable.
Here’s where you need effective strategies to manage your video sizes without compromising quality. Let’s explore the various methods to make your videos email-friendly.
How to Send a Video Through Email: 6 Easy Methods
Sending videos via email doesn’t have to be a hassle. Whether you’re sharing a promotional clip with clients or a cherished memory with family, understanding the best methods to deliver large video files efficiently is crucial. Below, we’ll explore five easy methods to help you send videos through email, ensuring your content reaches its destination smoothly without compromising on quality.
1. Compress Your Videos
Compressing your video file size is one of the simplest ways to ensure it can be sent via email. You can use various tools and software to do this.
- Online Tools—Services like FreeConvert allow you to compress videos directly in your browser.
- Video Editing Software—Programs like Animotica provide easy-to-use options for adjusting bitrate and resolution during the export process, which helps reduce file size without losing quality.
Now, let’s delve into the step-by-step guide on how to adjust bitrate and resolution using Animotica:
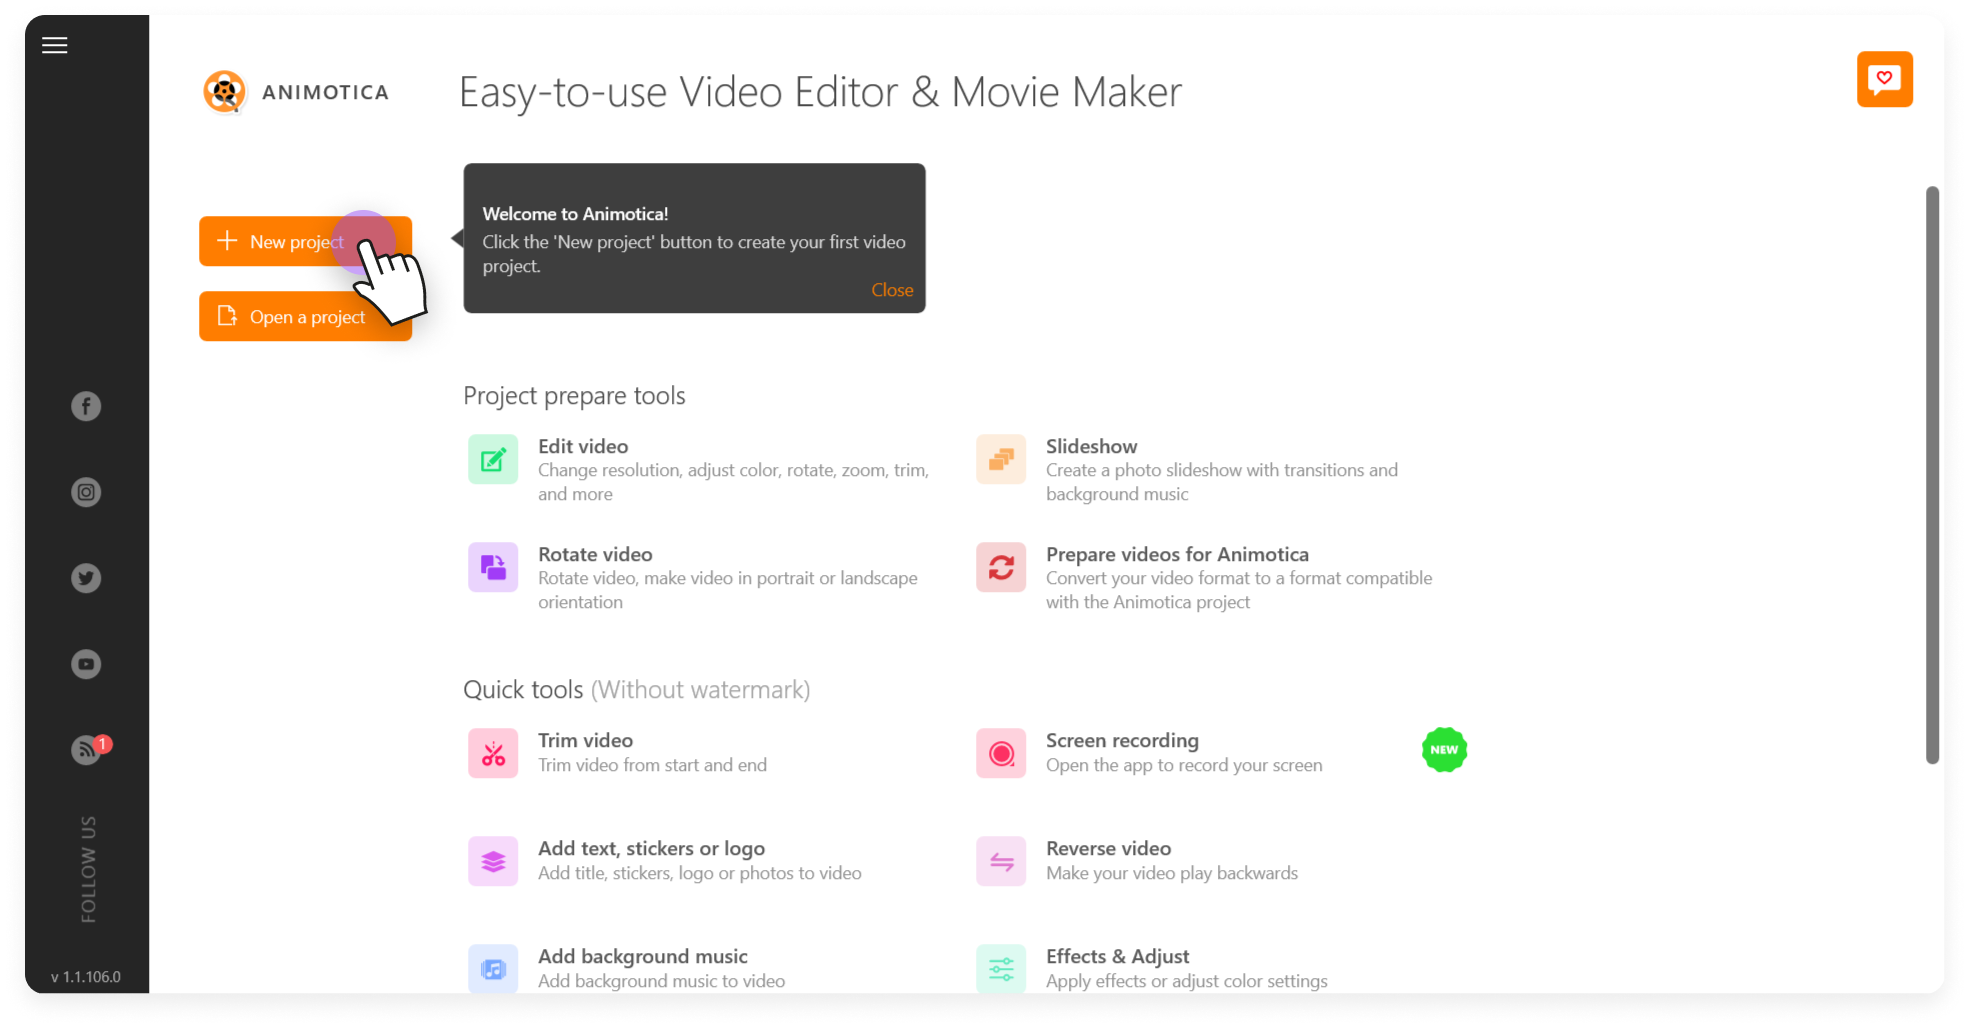
- Open Animotica: Launch Animotica on your PC and start a new project.

- Import Your Video: Click ‘Add Video or Photo Clips’ to import your video.
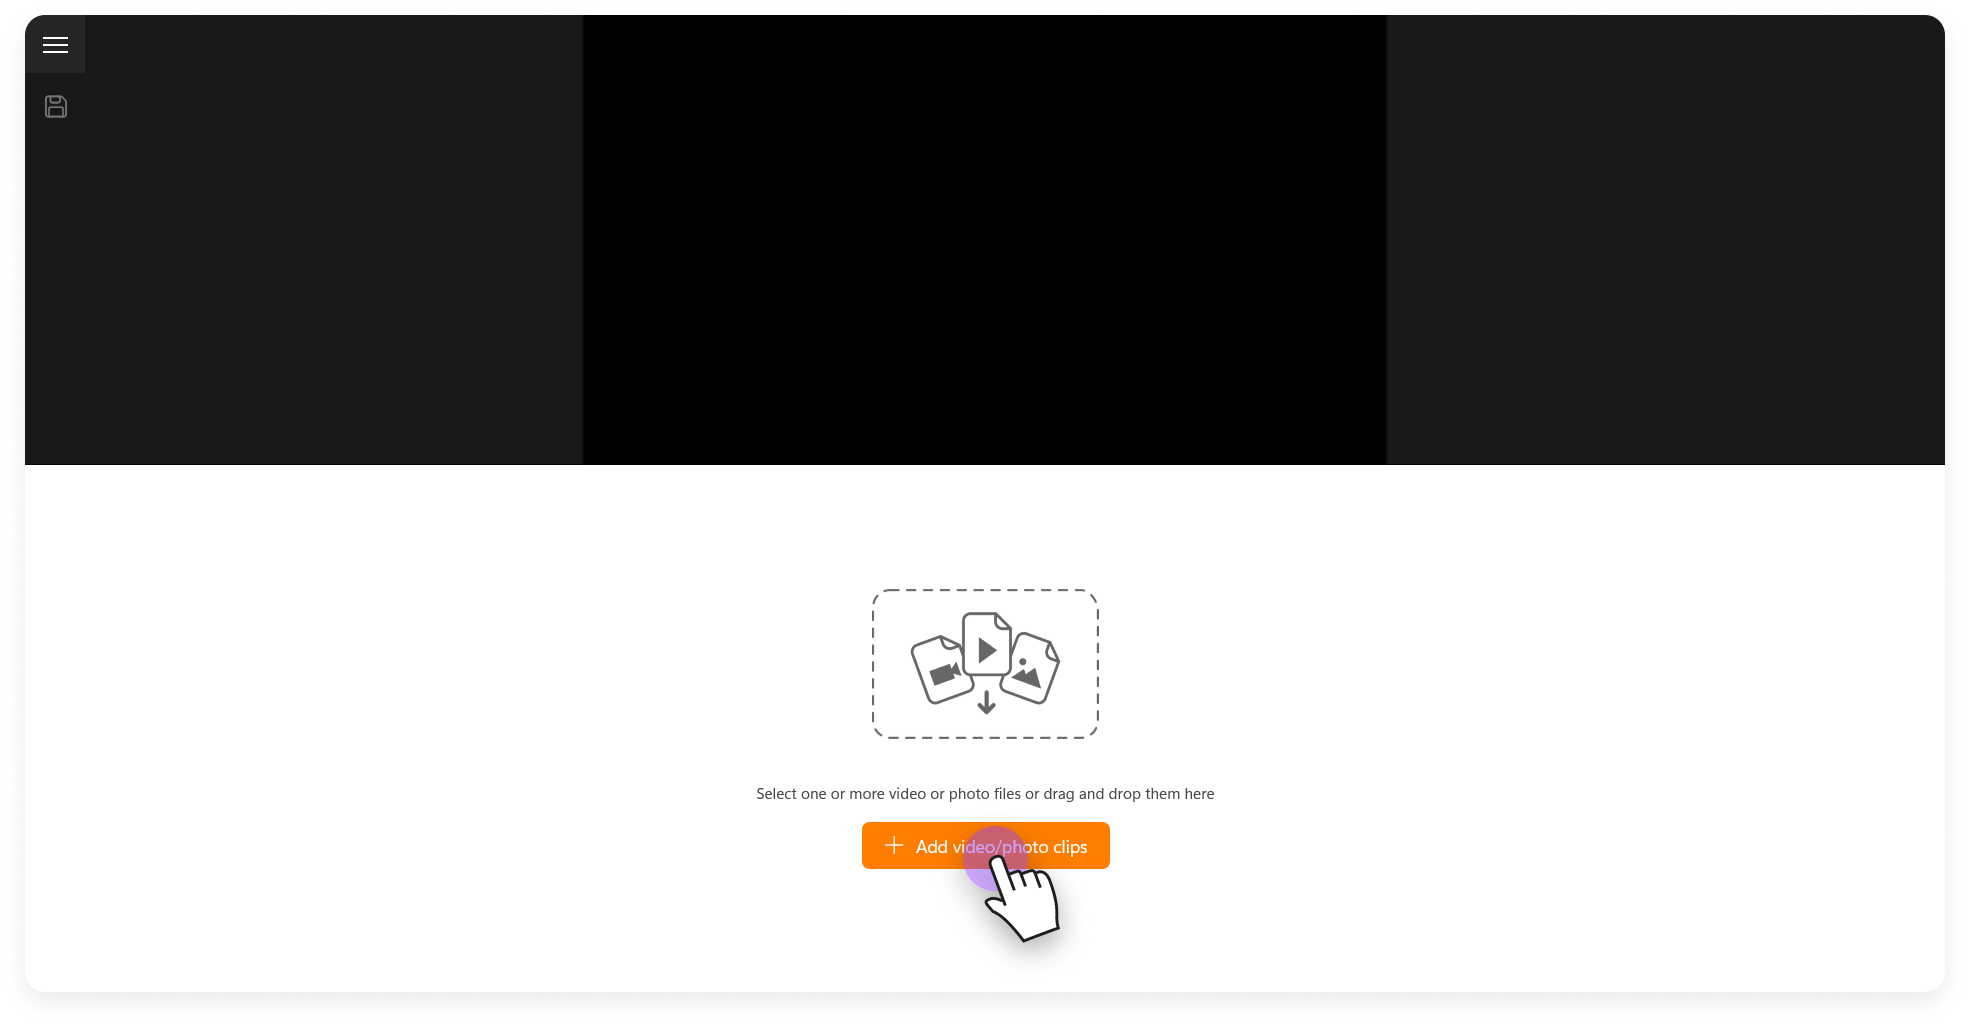
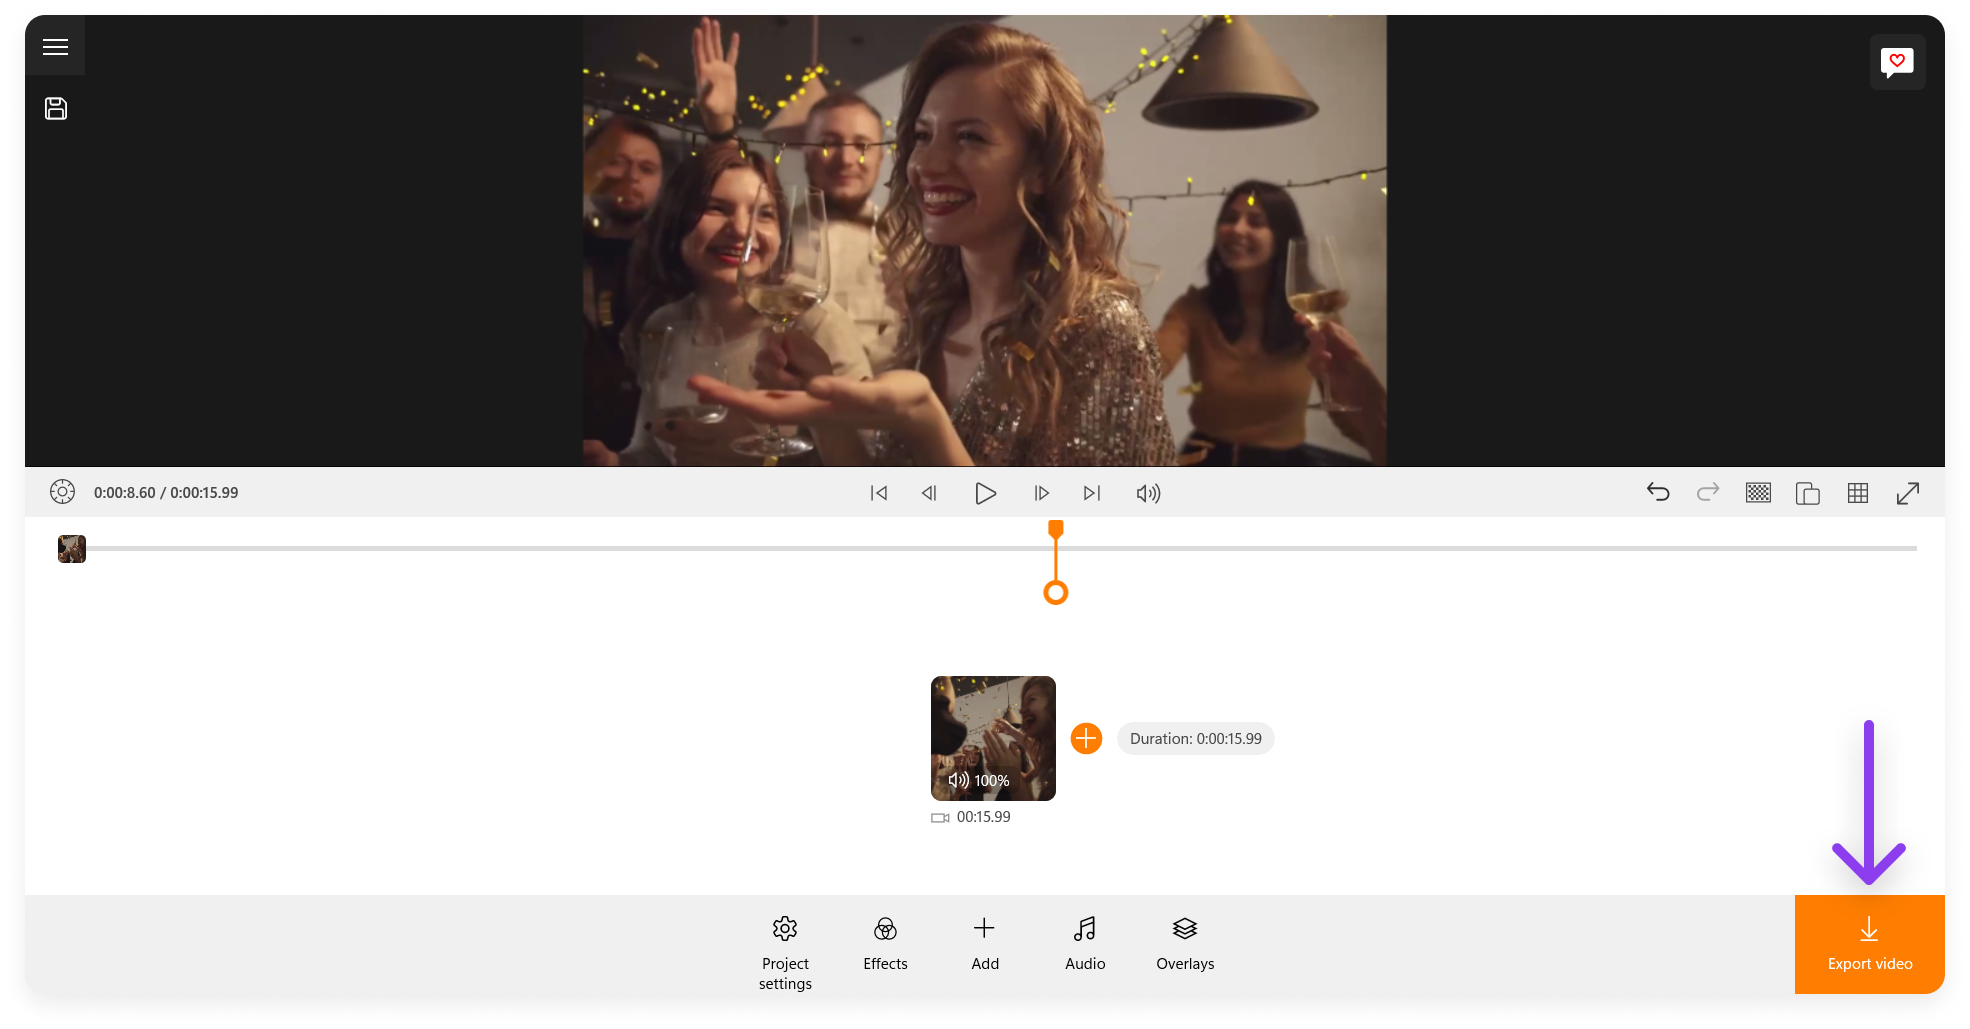
- Click Export Video: Click ‘Export video’ at the lower-right corner.
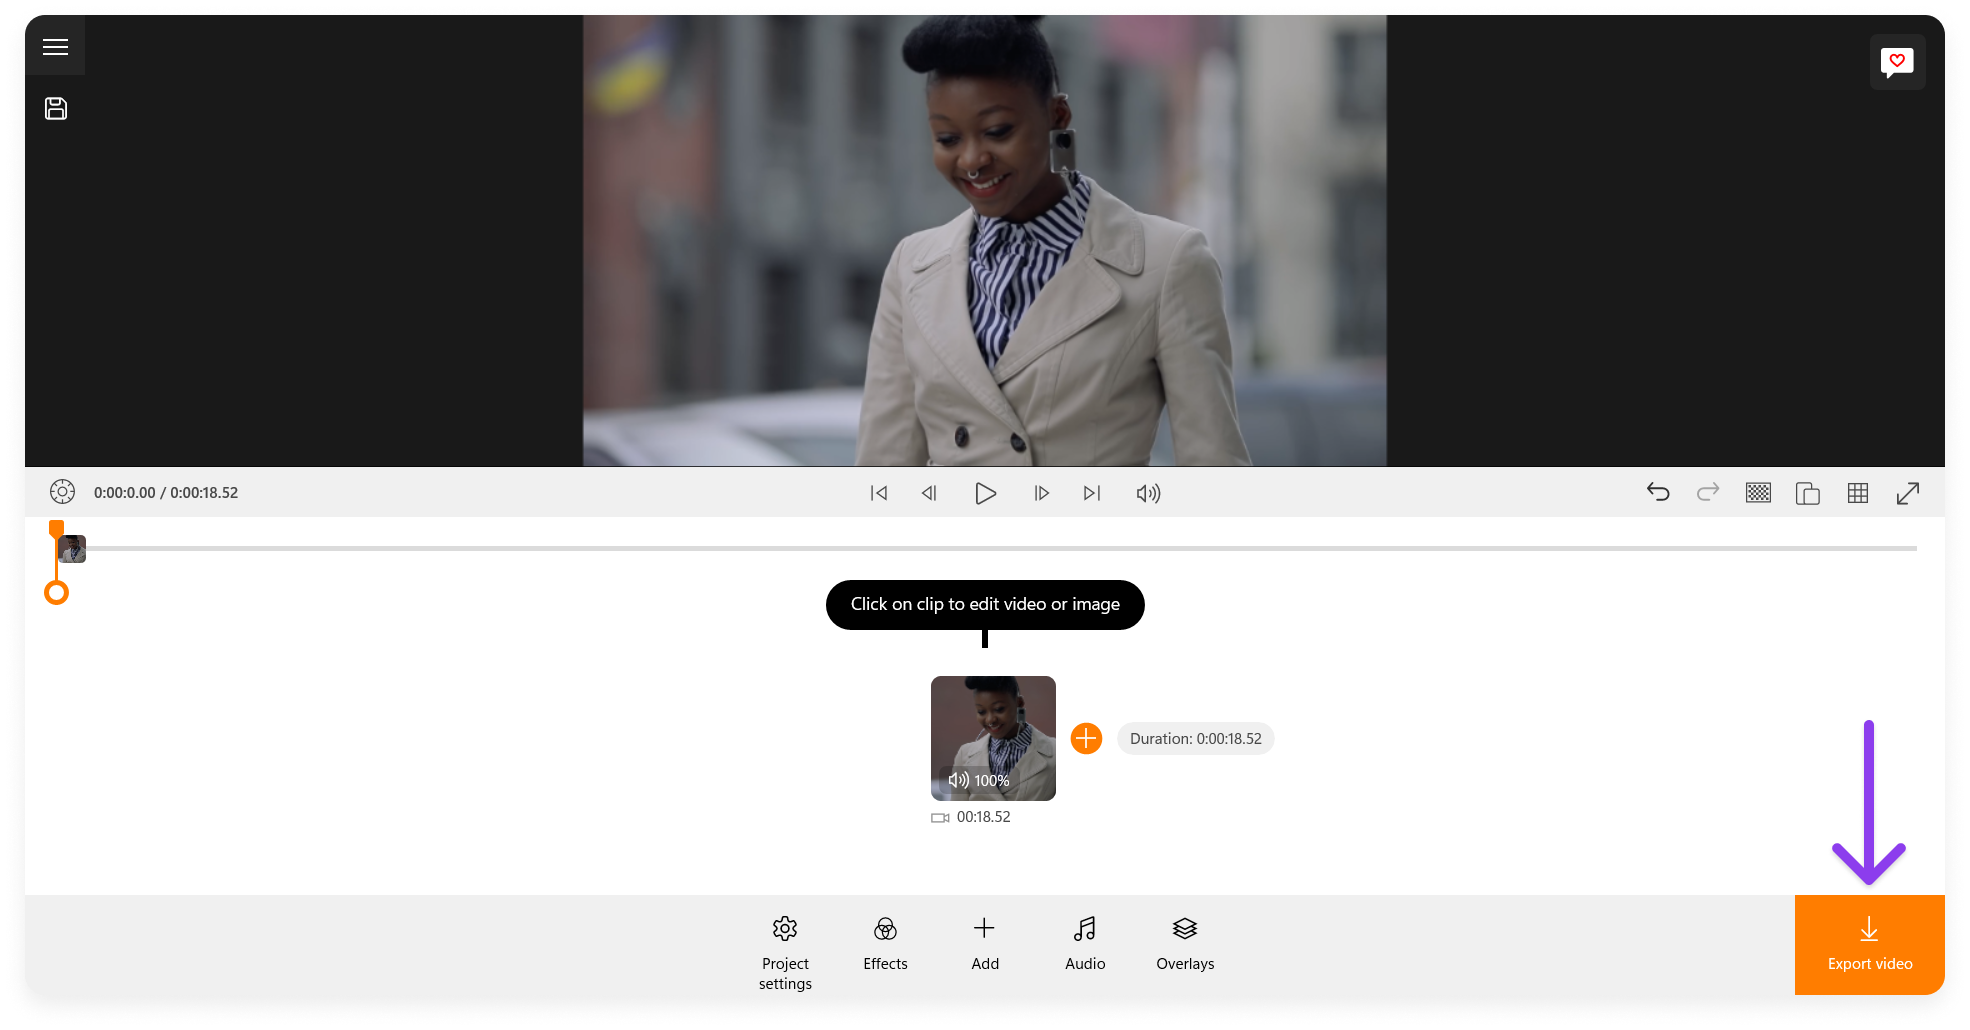
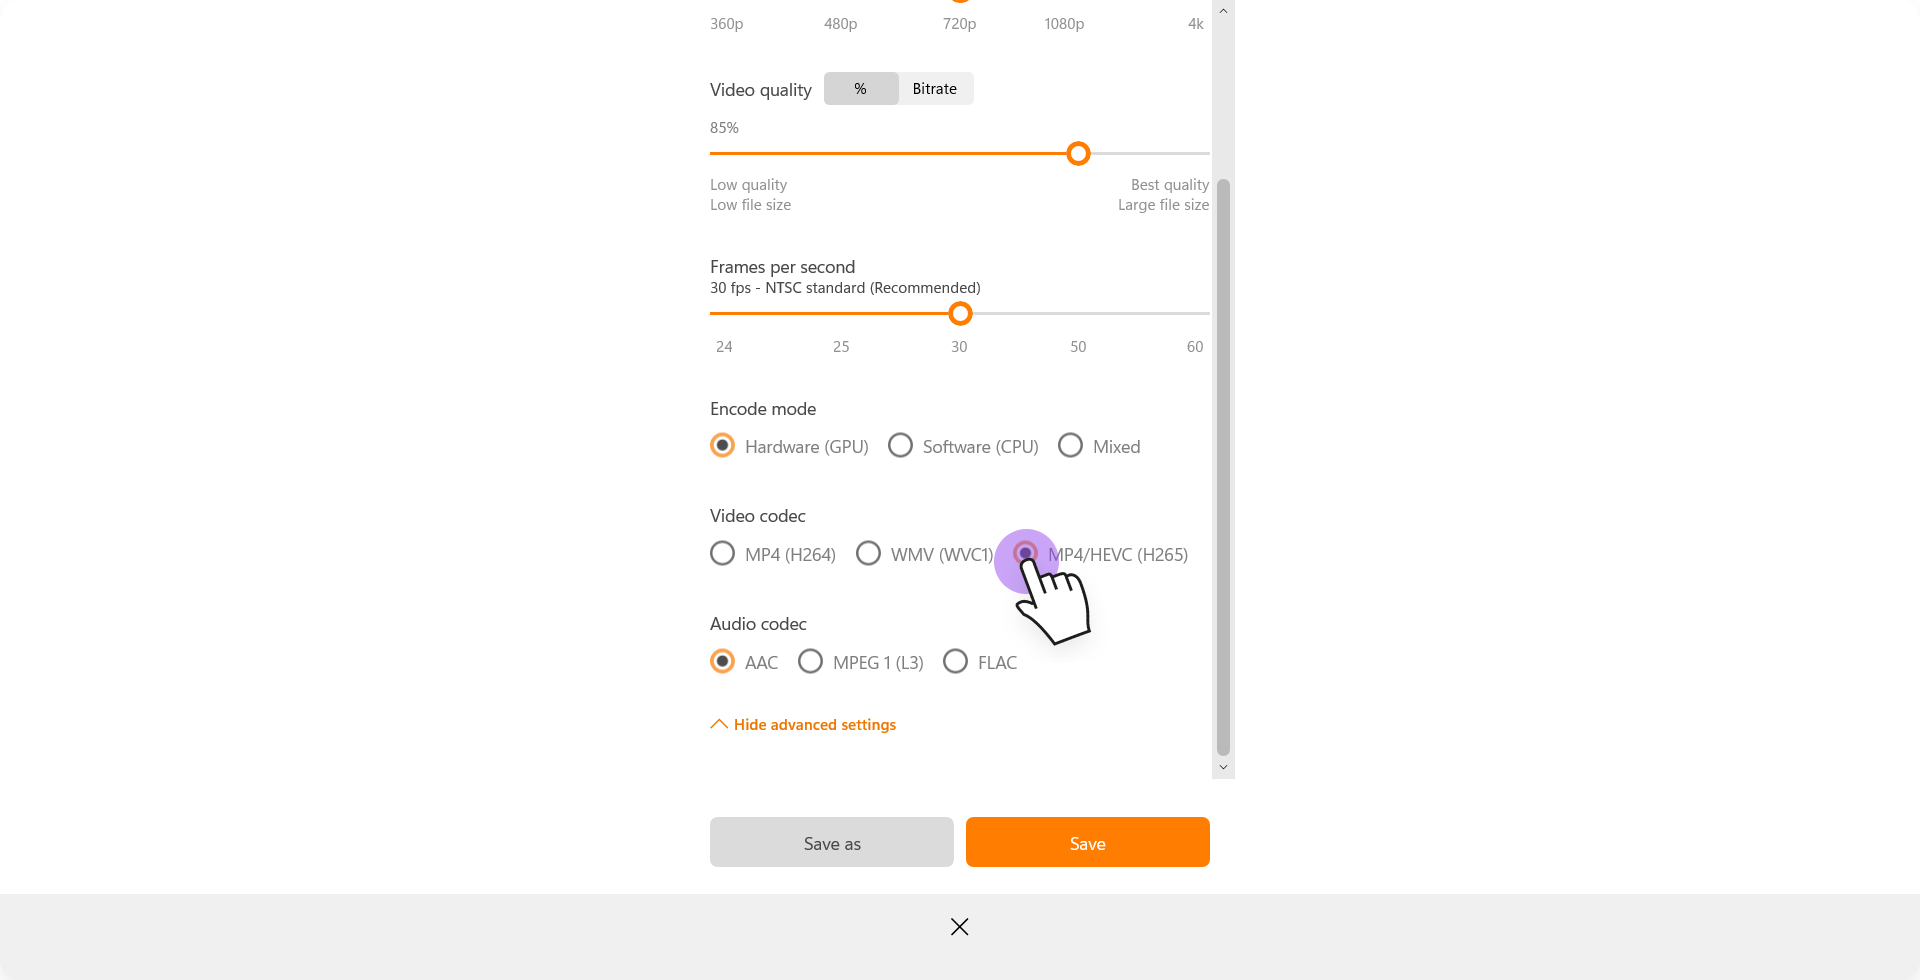
- Change Export Settings: Choose a lower resolution, like 720p (1280 x 720) or 480p (640 x 480), and the slider to reduce the bitrate.
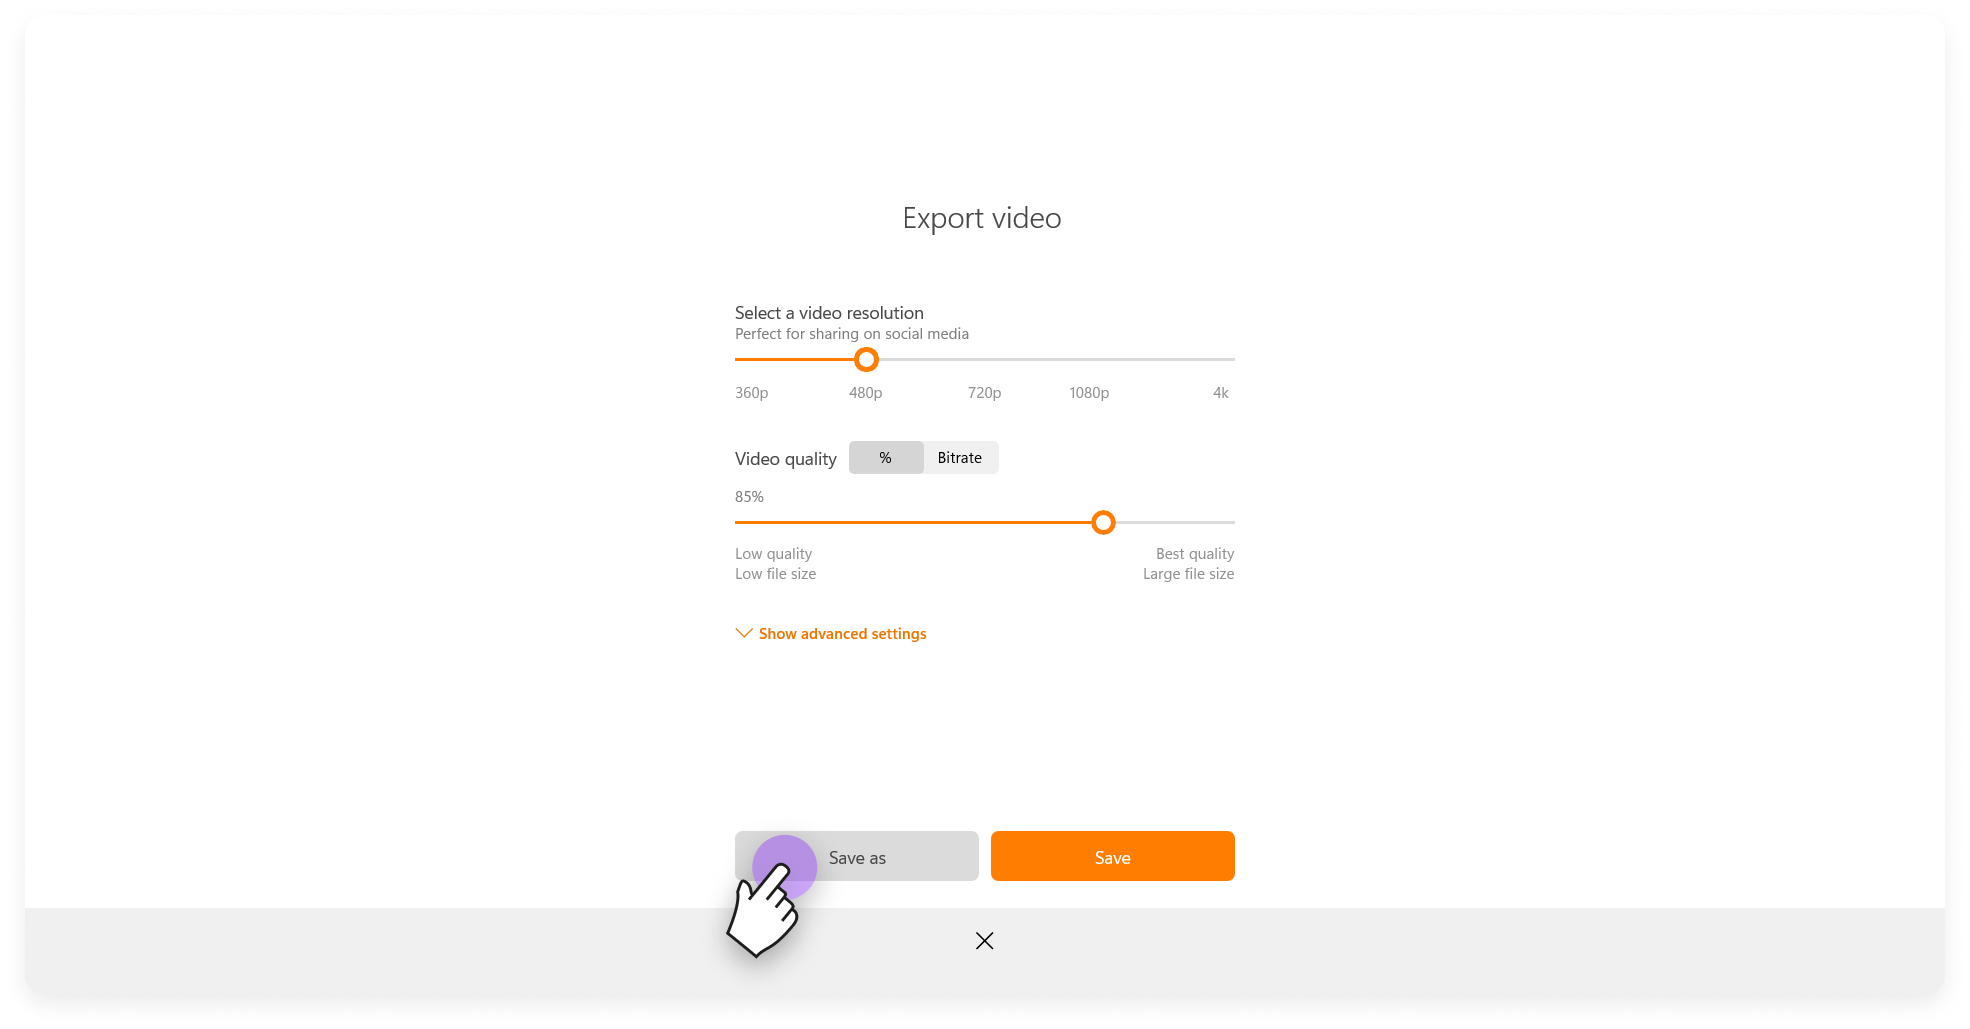
- Export Your Video: Click ‘Save As’ to save your video in the desired folder.

By following these steps, you can easily adjust the bitrate and resolution of your video using Animotica, making it suitable for sharing via email while optimizing the balance between file size and quality. Using Animotica, the video’s size was sized down by almost 40%, going from 38 MB to 15 MB.

2. Use a File Transfer Service
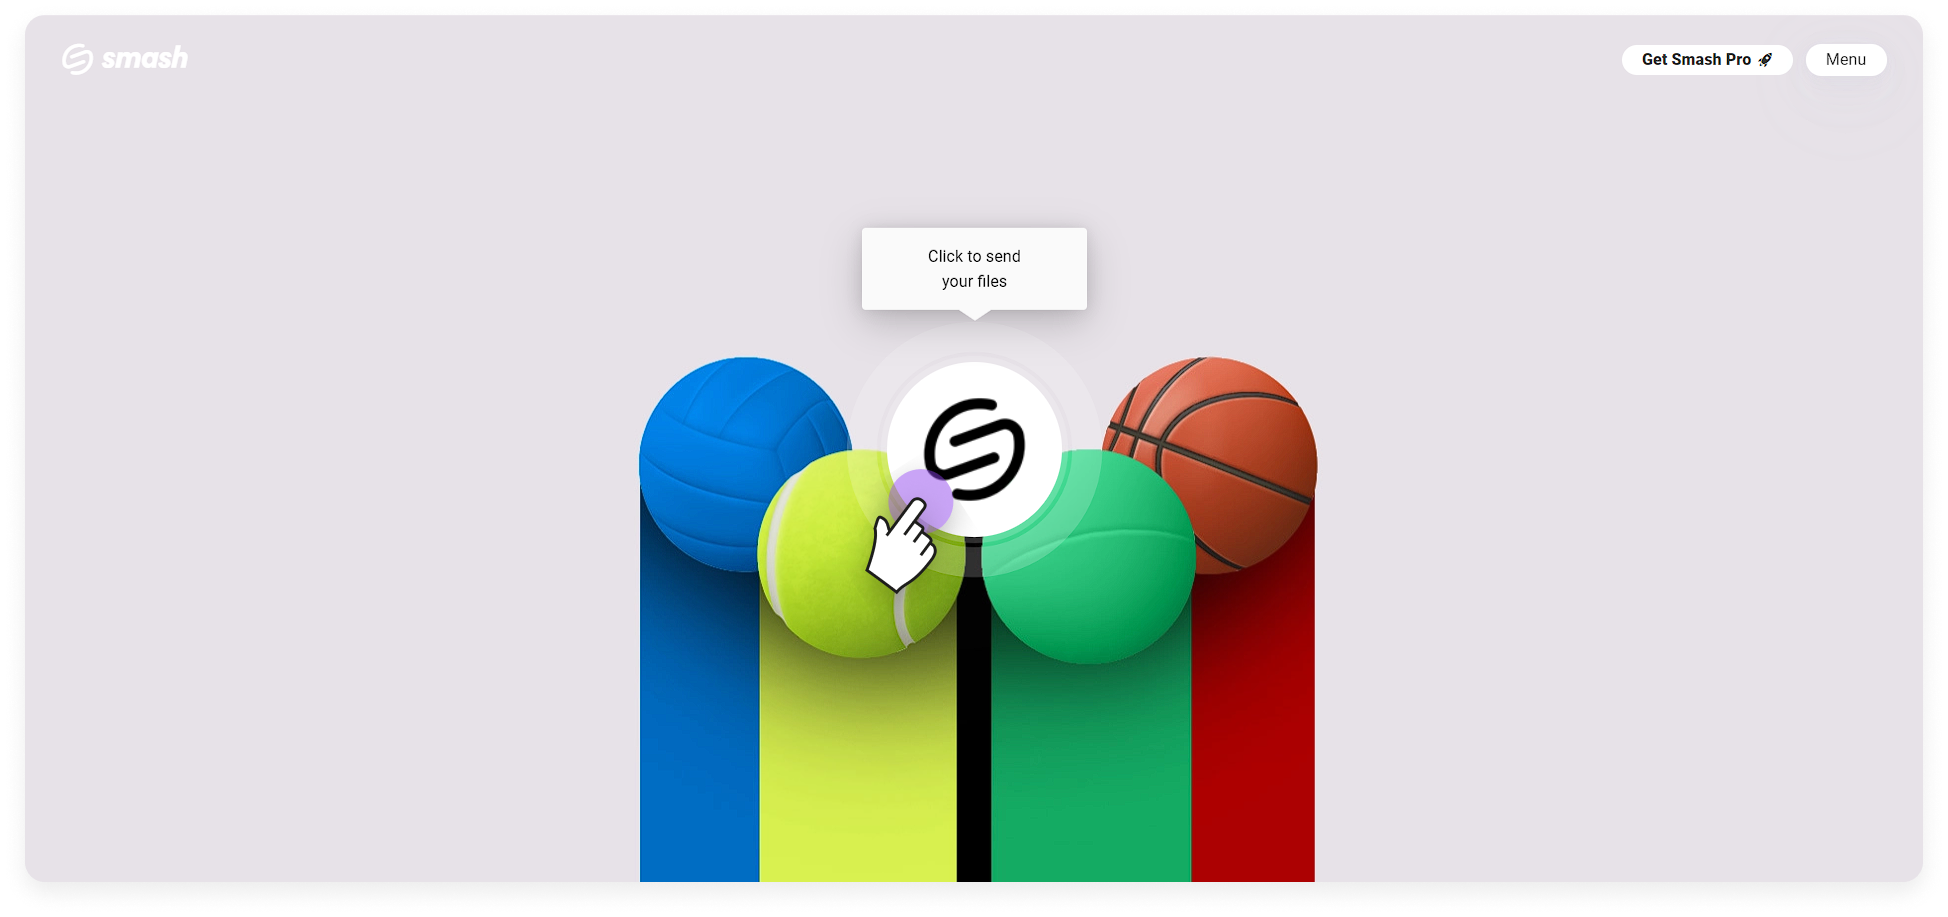
Another effective way to share large videos is by using online services to send big files. These platforms allow you to upload your video and then share a link with your recipients. Smash is known for its ease of use and the ability to send large files securely. Here’s how to upload a video to Smash and share it as a link via email:
- Navigate to Smash’s Website: Open your web browser and go to fromsmash.com.
- Upload Your Video: Click on the central button labeled “Click to upload your files”. You can also long click to send folders. Select the video file or video folder you wish to upload from your computer.
- Wait for Upload to Complete: Allow the file to upload. Depending on the size of your video and your internet speed, this might take a few minutes.
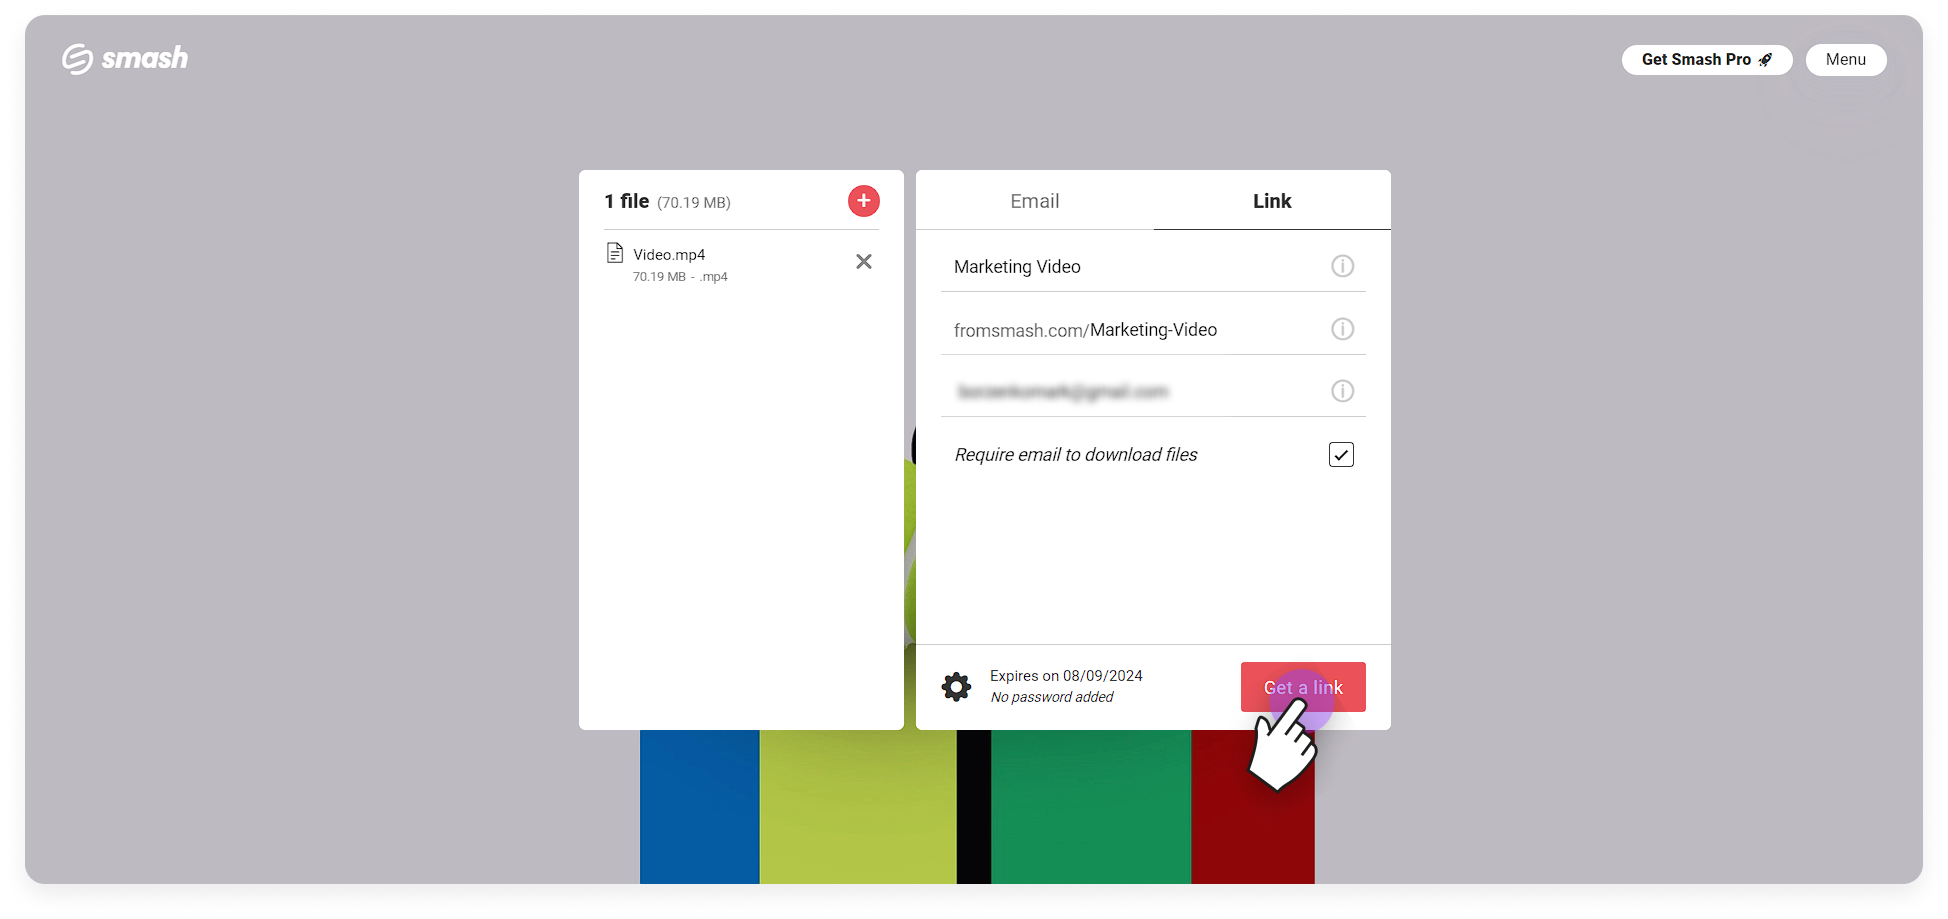
- Customize Your Transfer (Optional) and Click Get Link: Once the upload is complete, you can customize your transfer with titles and slugs and even require an email address to track downloads of your video. After you are done customizing your link, click the “Get Link” button.
- Copy the Link: After you confirm your email and wait until your video is fully uploaded on Smash, click the “Copy link” button.
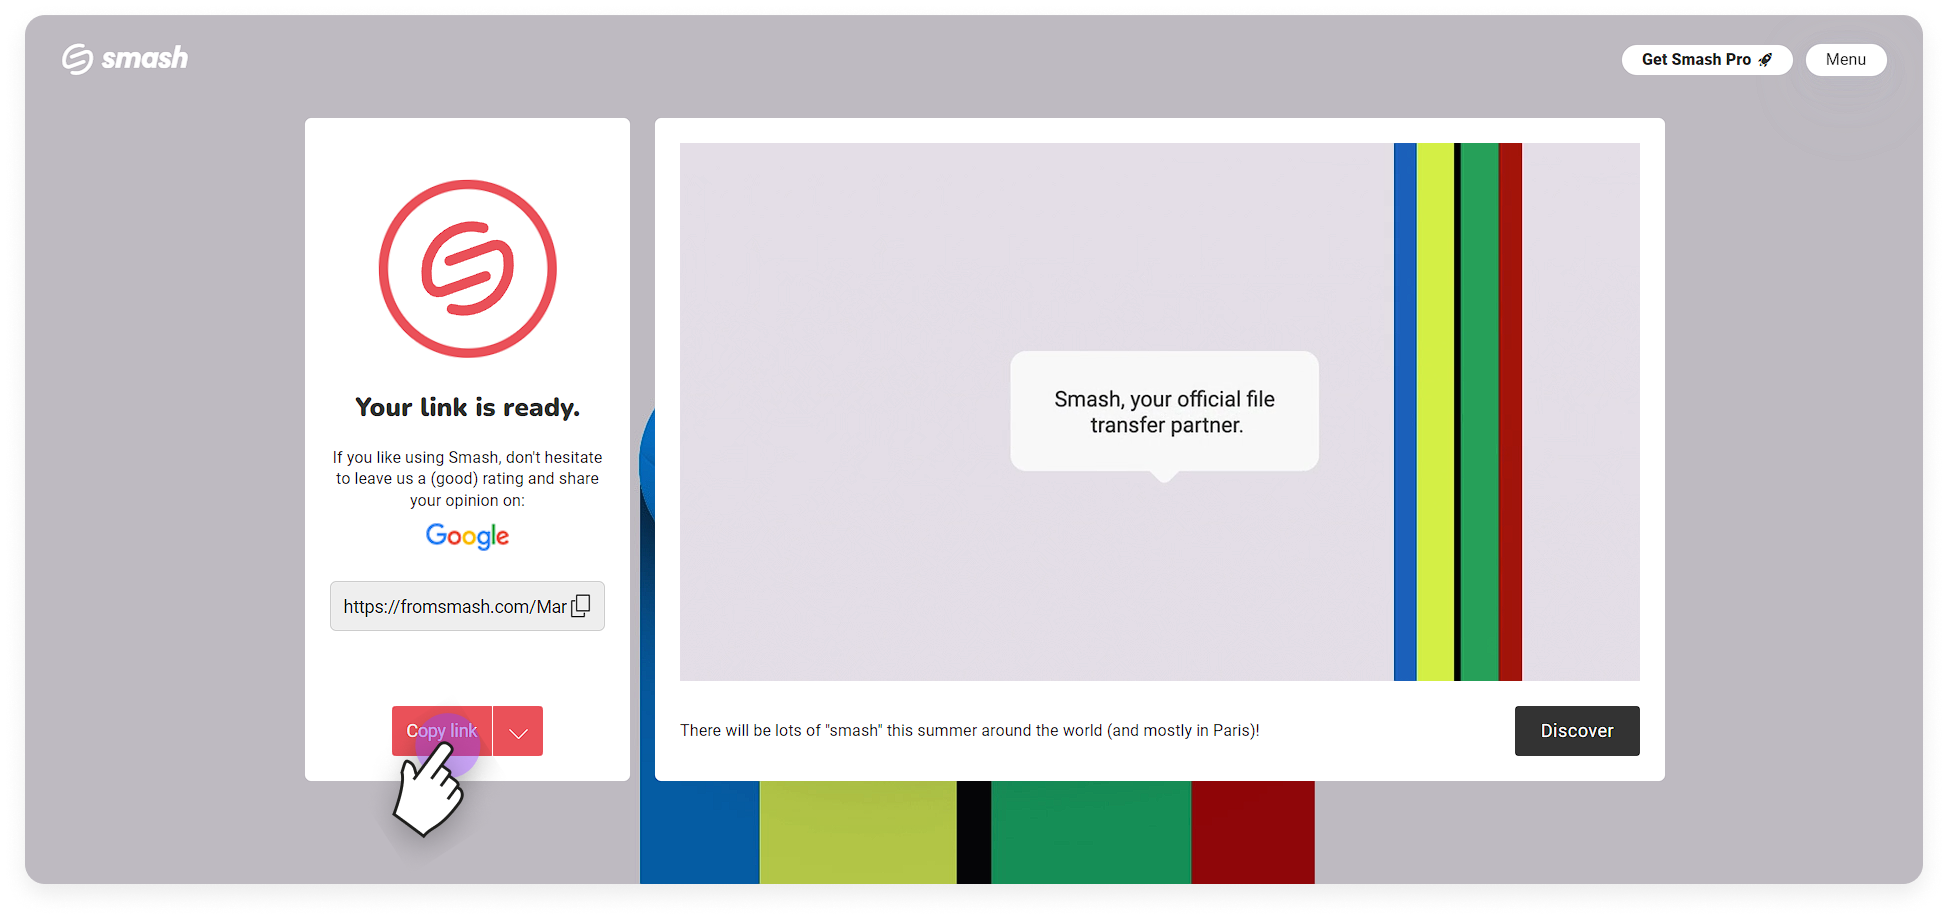
- Email the Link: Open your email client and compose a new email. Paste the copied Smash link into the email body and send it to your recipient.
With these robust features, Smash ensures that sharing large video files becomes a hassle-free experience. Its advanced privacy options and customizable transfers make it a reliable choice for both personal and professional use. So next time you’re faced with the challenge of sending a high-quality video, consider giving Smash a try for an efficient and user-friendly solution.
3. Use Video Sharing Platform
Sometimes, compressing your video just isn’t enough, especially if the file size remains too large. This is where video-sharing platforms come to the rescue. Using video-sharing platforms can help you share your videos without worrying about size limitations. Here’s how you can do it:
YouTube is straightforward and offers the added benefit of easy access for your recipients. After uploading your video, you can set it to “Unlisted” if you prefer that only people with the link can view it.
- Log into your YouTube account: Sign in to YouTube using your Google account.
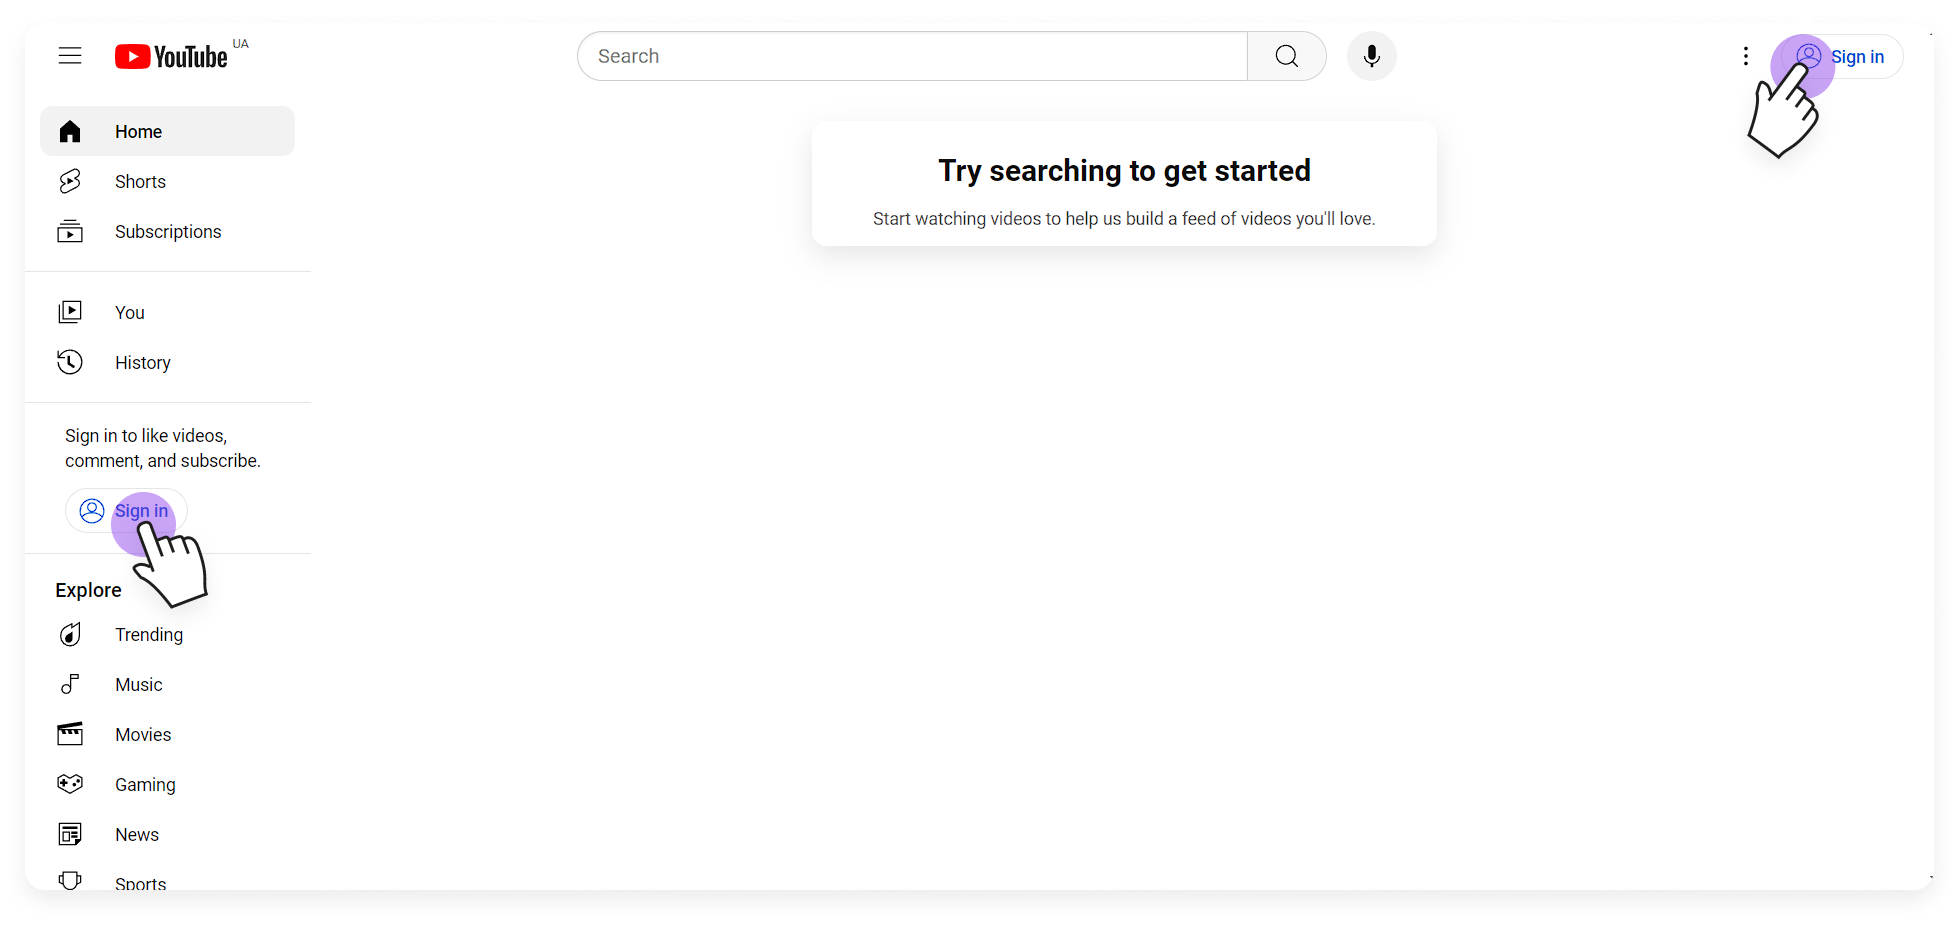
- Select Upload video: Click the camera icon in the top-right corner to upload your video.
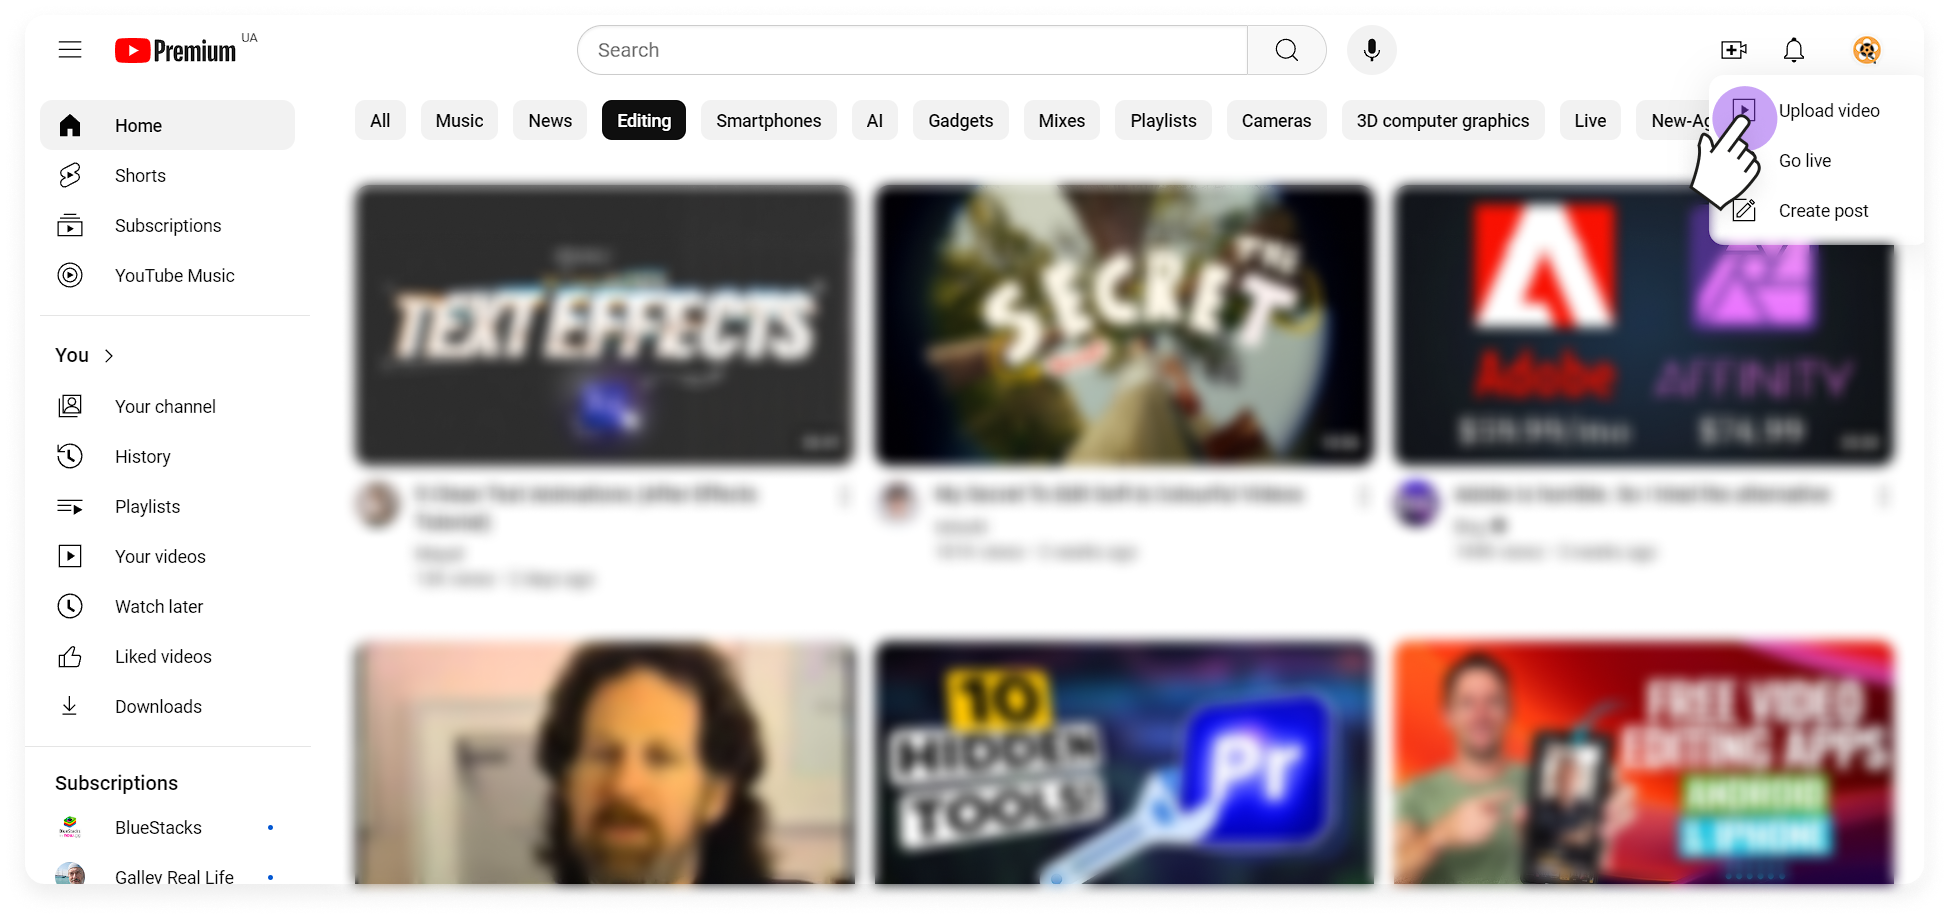
- Choose the visibility settings: Fill in the necessary details and select “Unlisted” or “Private” to keep your video from being publicly accessible.
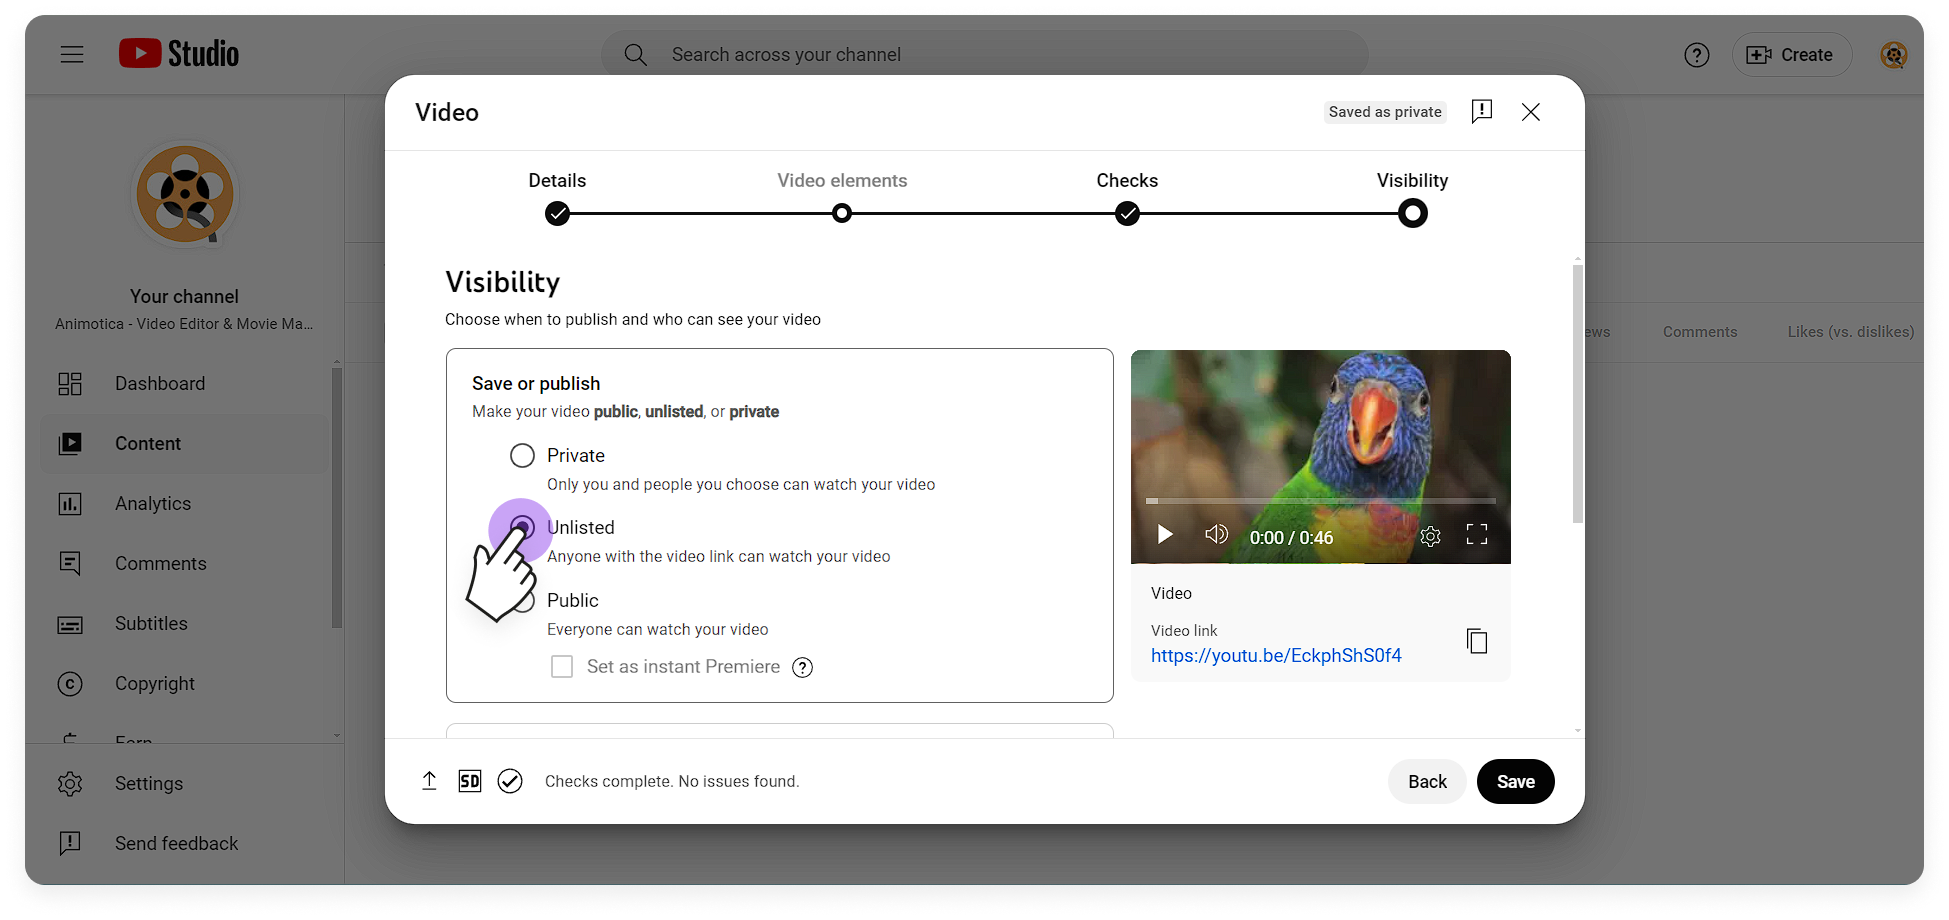
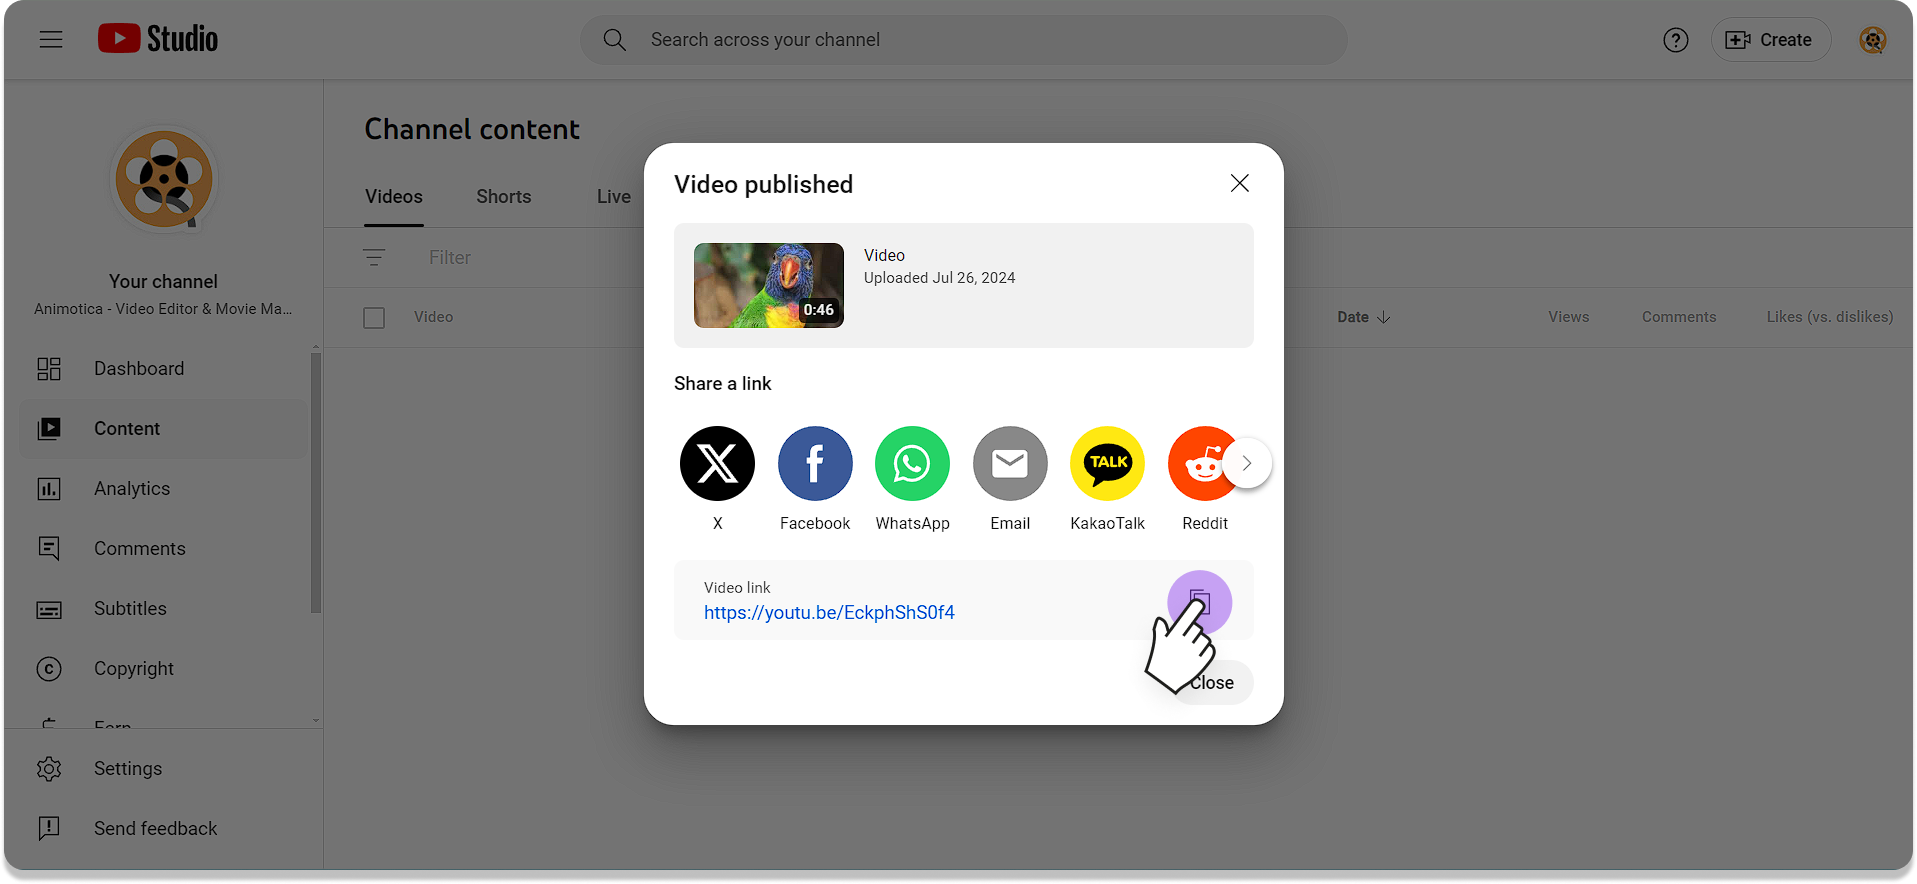
- Upload Your Video to YouTube: Once uploaded, copy the video link and share it via email.
By utilizing video-sharing platforms, you can bypass the size limitations imposed by email service providers while still delivering high-quality video content to your audience. This method is particularly effective for content creators, educators, and marketers who frequently share large video files.
4. Trim or Crop Your Video
If your video is too long, trimming or cropping unnecessary portions can significantly reduce its size. Video editing software like Animotica allows you to precisely edit your video to remove unnecessary parts, making it small enough to email.
Here’s a step-by-step guide on how to trim your video using Animotica:
- Open Animotica: Launch Animotica and click on the ‘New Project’ button.

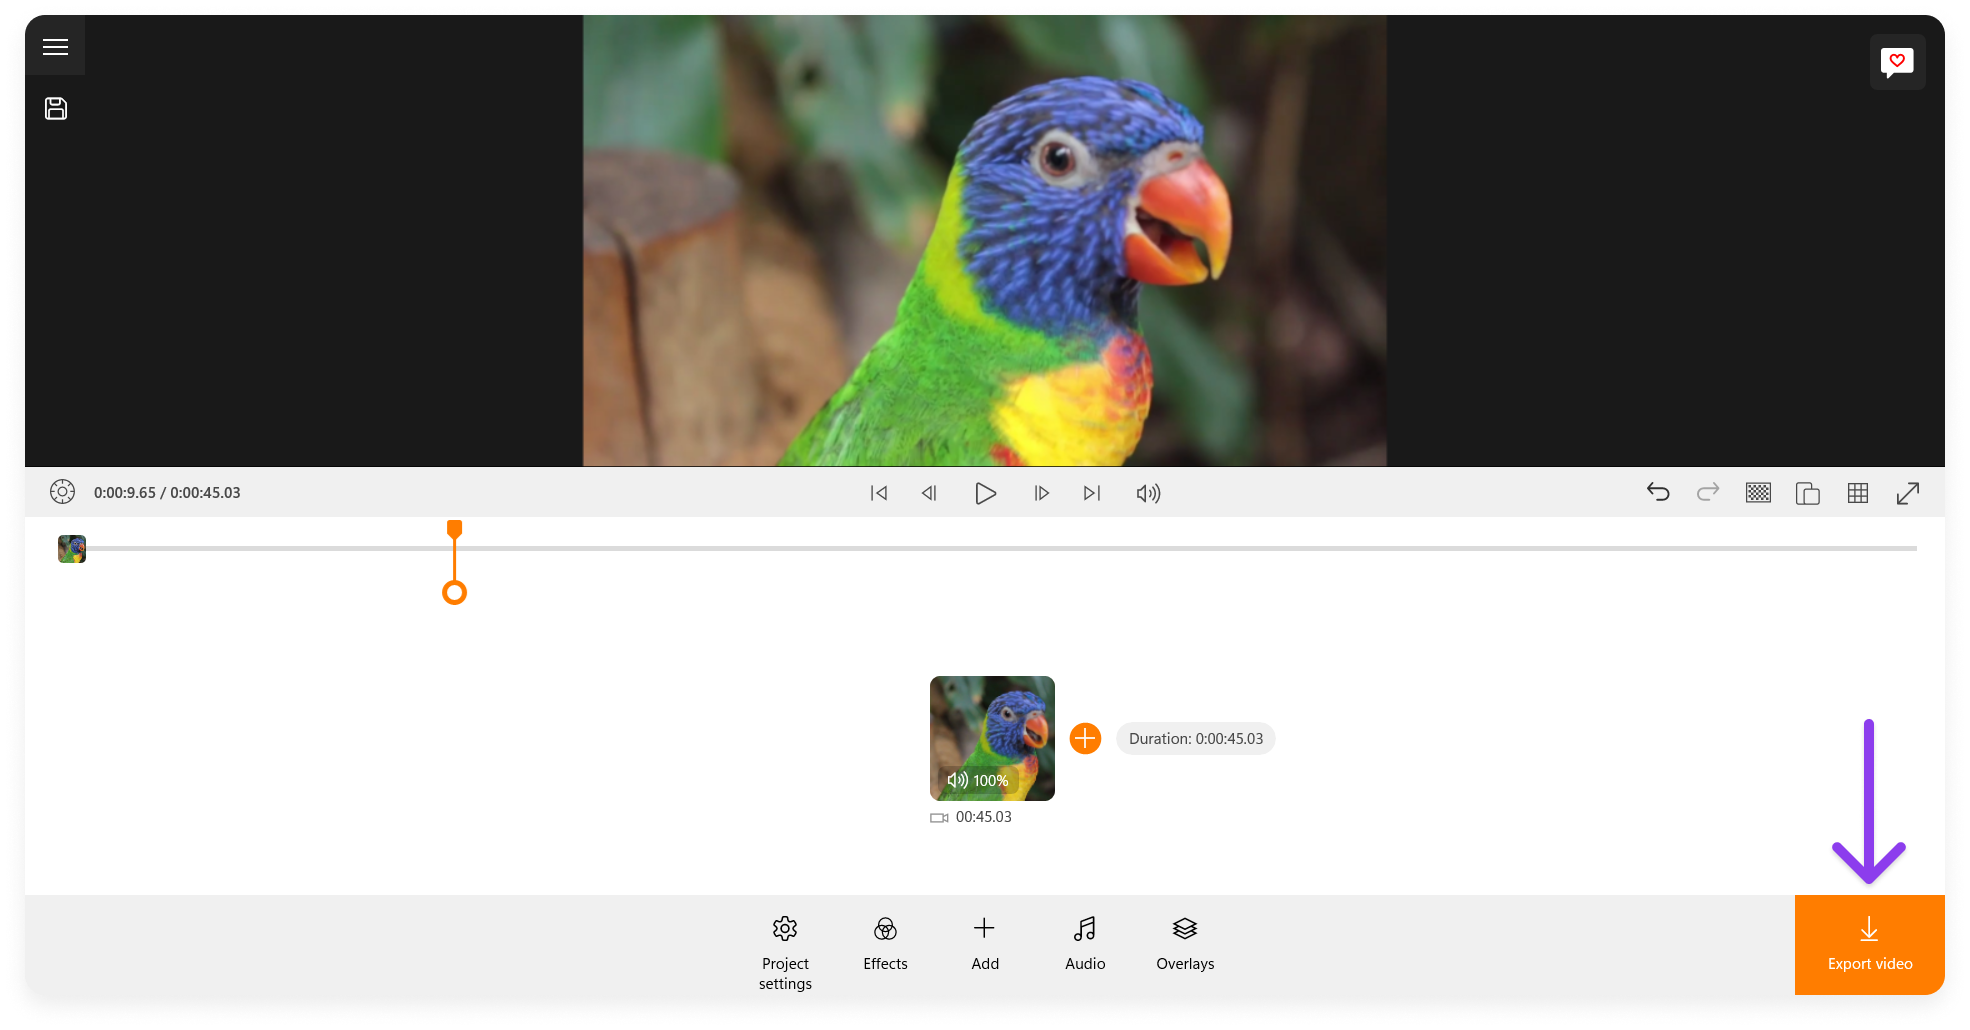
- Import Your Video: Select ‘Add Video/Photo Clips‘ to import the video you want to trim.

- Select the Trimming Tool: Once your video is loaded, click on the video clip in the timeline to select it. Then, click on the ‘Trim‘ button, which appears in the toolbar below the timeline.
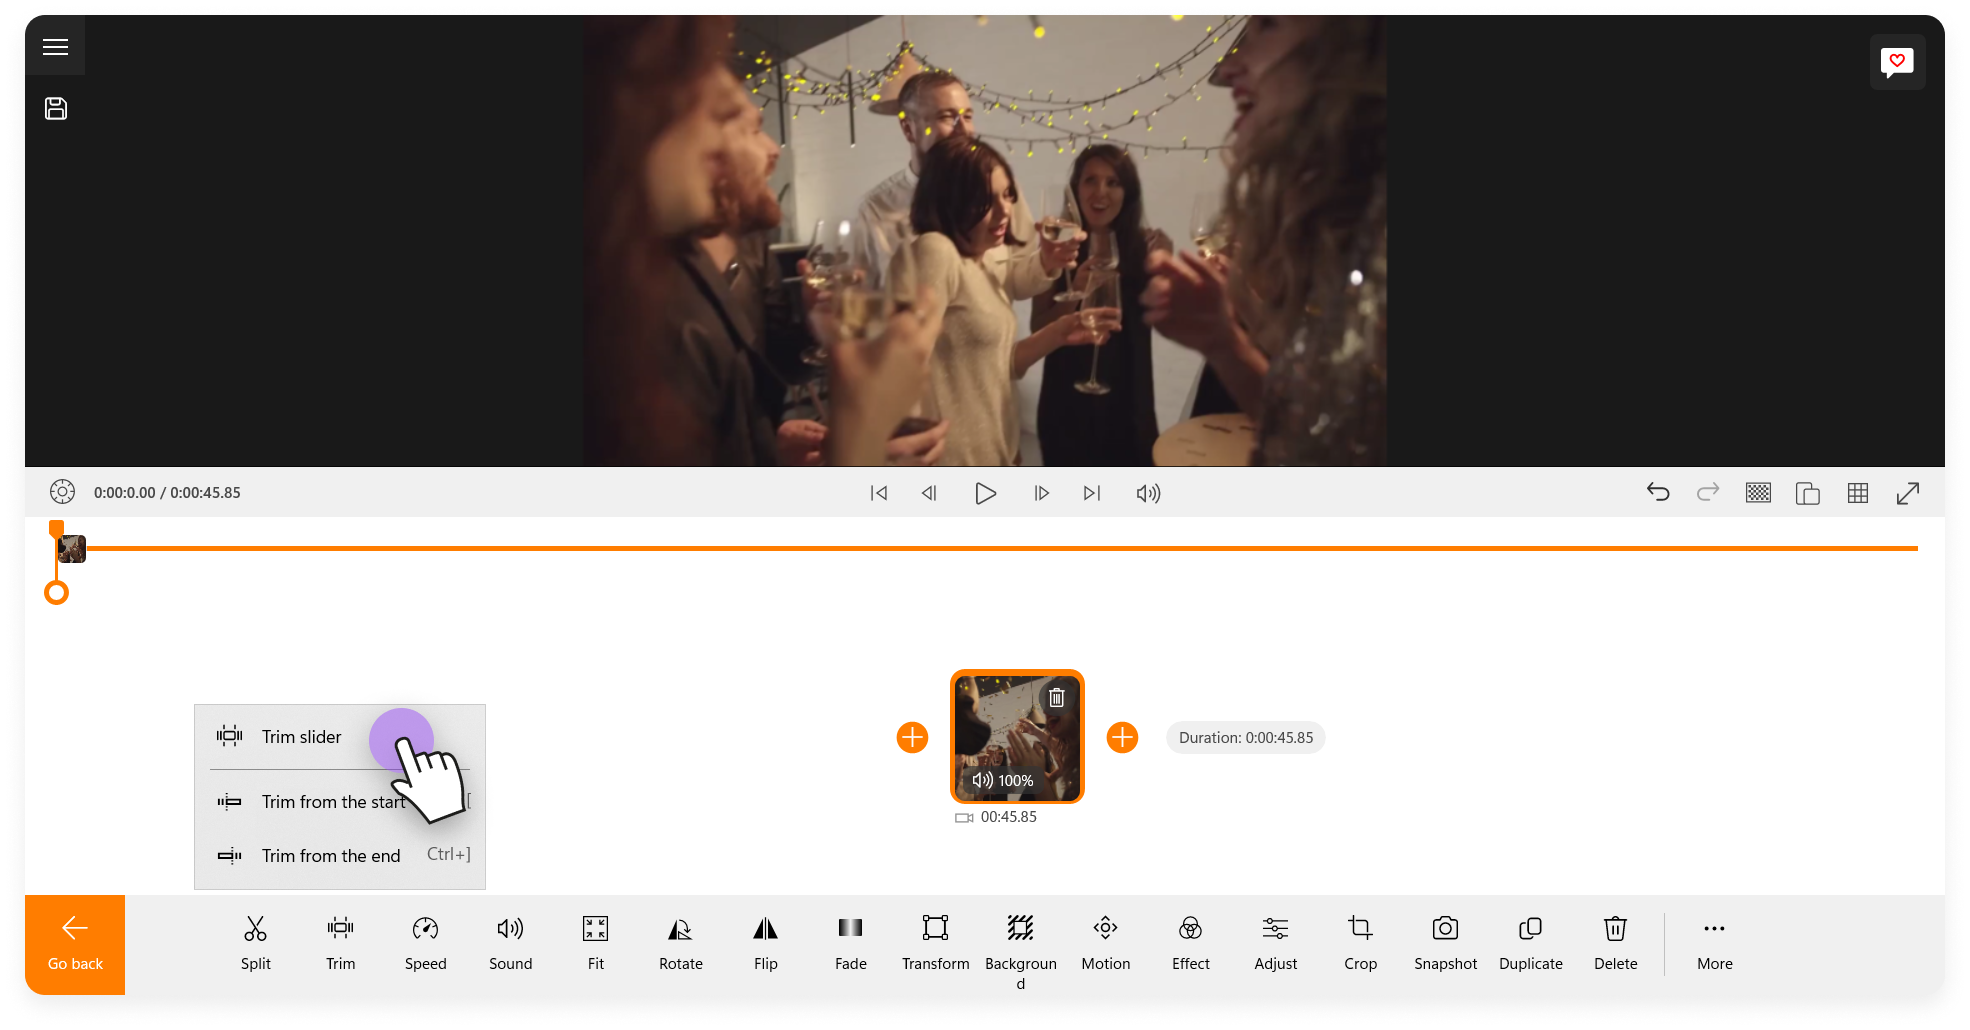
- Adjust the Trim Markers: You’ll see two markers at the beginning and end of the video timeline. Drag these markers inward to select the portion of the video you want to keep.

- Export Your Trimmed Video: Finally, click on the ‘Export Video’ button to export your trimmed video. Choose the desired resolution and bitrate to ensure the video meets email size requirements.
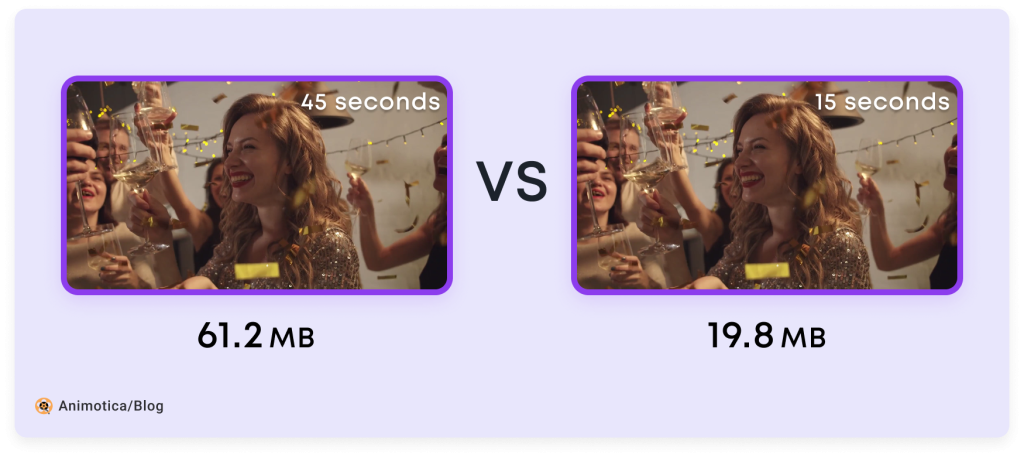
Trimming a 45-second video down to 15 seconds has proven to significantly reduce file size by over 30%, shrinking the video from 61.2 MB to 19.8 MB without altering the original 1080p resolution. For optimal results, users can combine trimming and resolution adjustments to achieve a perfect balance between file size and video quality.
5. Convert Video Codecs
Switching your video format to MP4 can help reduce file size, as it offers good compression with minimal quality loss. H.265 (HEVC) videos are generally smaller than H.264 (AVC) videos at the same quality, providing similar or better visual quality at half the bitrate. This makes H.265 more efficient for high-definition and ultra-high-definition video content.
- Use tools like CloudConvert or online converters to reformat your video files.
- Animotica also supports exporting videos in various formats, simplifying the conversion process. You can even export your videos in H.265 for better compression efficiency.
Here’s how you can export your video in H.265 using Animotica:
- Launch Animotica: OpenAnimotica and click ‘New Project’.
- Upload Your Video: Click ‘Add Video/Photo Clips‘ to upload the video you want to change the codec to H.265.

- Click Export Video: Click the Export button to go to the advanced settings.
- Change Video Codec: In the advanced export settings, select the H.265 format from the dropdown menu. If needed, change the resolution and bitrate.
- Save Your Video: Click on Save to save your video in the H.265 format in the desired folder.
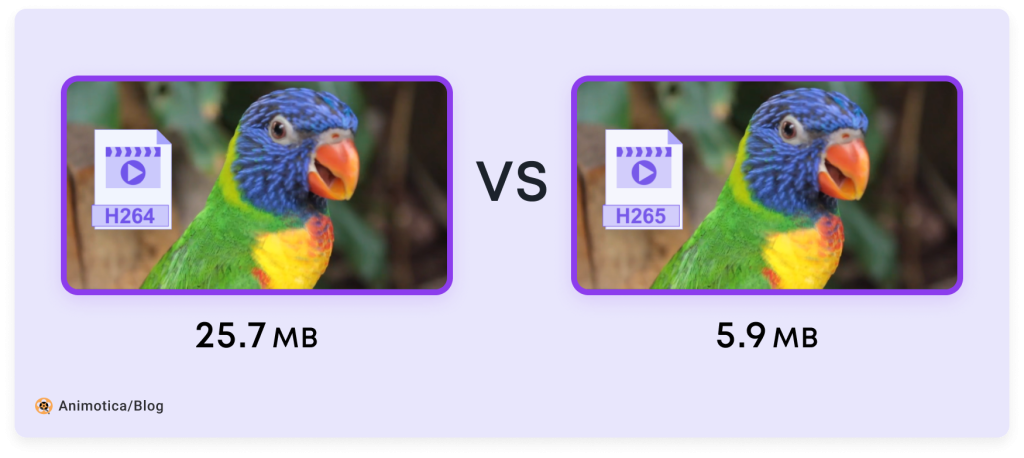
Switching the video codec to H.265 proved effective, reducing the video size by over 20% without altering quality or bitrate—from 25.7 MB to 5.9 MB. To achieve the ideal video size for email, remember to also experiment with resolution and bitrate. For more detailed information on H.265 and its benefits, you can refer to a detailed guide on HEVC.
6. Create a ZIP file
Creating a ZIP file is a straightforward way to compress and send large videos via email. This method consolidates your video file into a single, more manageable package, making it easier to share with others. Here’s how you can do it:
Step-by-Step Guide to Creating a ZIP File
- Select Your Video File: Locate the video file you wish to compress on your computer. Right-click on the file to bring up a context menu.
- Choose the ‘Compress to ZIP File’ Option: In the context menu, click the ‘Compress to ZIP File’
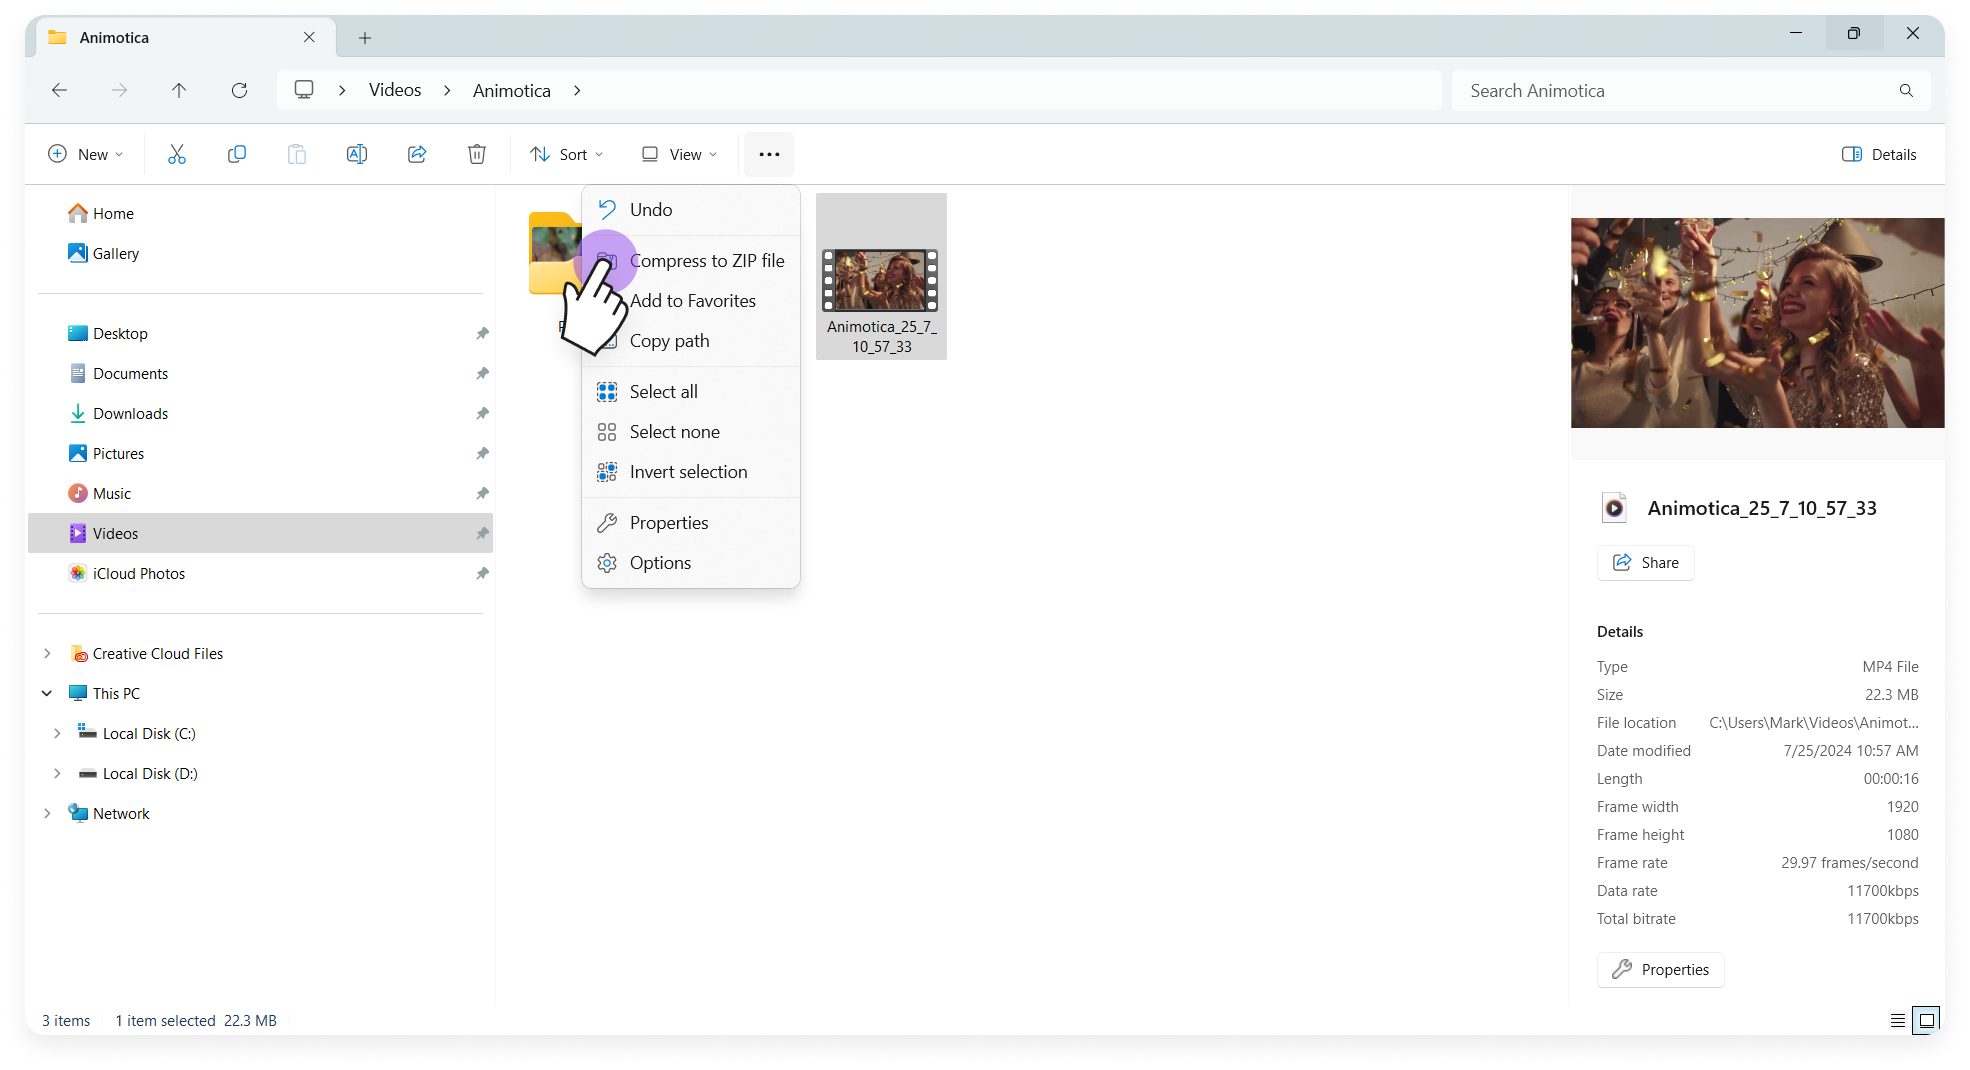
- Rename the ZIP File: Once the ZIP file is created, you can rename it to something that indicates its contents, making it easier for the recipient to identify.
- Attach the ZIP File to Your Email: Open your email client and compose a new email. Use the attachment option to add the newly created ZIP file to your email.
And there you have it! Your video is now compressed into a ZIP file and is ready to be sent through email. This method is particularly useful for videos that are just slightly over the size limit imposed by email providers.
It’s worth noting that while ZIP files reduce the size of your video, they may not compress it enough if your video is extremely large. In such cases, combining this method with other techniques mentioned in this guide, like using cloud storage or compressing the video beforehand, can be more effective.
5 Tips for Reducing Video Size for Email Sharing
Sending large video files via email can be tricky due to file size limitations and the risk of losing quality during compression. However, with the right strategies and tools, you can ensure your videos are delivered smoothly without sacrificing quality. Here are five essential tips to help you navigate these challenges and make your video-sharing process as seamless as possible:
- Consider the File Format—Some video formats and codecs are more compression-friendly than others. Formats like MP4 and MOV are widely compatible and balance quality with file size. Codecs like H.264 and H.265 (HEVC) optimize video size and quality efficiently. Ensure your video uses one of these formats and codecs before sending.
- Break Your Video into Smaller Parts—If compressing or using cloud services isn’t feasible, you can break your video into smaller clips. This way, each clip can fit within the email size limits and be sent separately.
- Use a Link Shortener—When using cloud storage or video-sharing platforms, a long URL can be cumbersome. Utilize a link shortener service to create a neat, manageable link to share with your recipient, ensuring it looks clean and is easy to click.
- Encrypt Your Files—For sensitive content, consider encrypting your video files before sending them. Tools like WinZip offer encryption options alongside compression, adding an extra layer of security to your email attachments.
- Test Before Sending:—Always test the video-sharing method by sending the video to yourself or a colleague first. This will help you ensure that the video content is accessible and maintains quality across different devices and email platforms before reaching your intended recipient.
By following these tips, you can ensure your videos are delivered smoothly and securely to your recipients.
Bringing It All Together
Having addressed the common challenges and provided viable solutions for sending videos via email, you now have a comprehensive toolkit for seamless video sharing. Whether compressing your videos, utilizing cloud storage services, or making simple edits with a tool like Animotica, each method ensures your videos reach their recipients without hassle.
Let’s recap:
- Email Limitations—Recognize file size restrictions imposed by email providers.
- Compression—Reduce file size while maintaining quality for easier emailing.
- File Transfer Services—Use services like Smash to share large videos via links.
- Video Sharing Platforms—Share large videos as convenient links using platforms like YouTube or Vimeo.
- Video Formatting—Convert to efficient formats to reduce size without quality loss.
Consider using Animotica for your video editing needs. Its user-friendly interface helps you to trim, change video codecs, and adjust settings like bitrate and resolution, optimizing your videos for email.
Experimenting with these methods will help you find the best approach for your needs. Share your experiences and additional tips with us. If you haven’t tried Animotica yet, download it now and transform your video preparation process. Happy emailing!
FAQ on Sending a Video Via Email
What video formats are best for emailing?
Selecting the right format when emailing videos is essential for compatibility and file size efficiency. The top recommendations are MP4 and ZIP formats.
- MP4: Known for its balance between high video quality and small file size. Widely supported, MP4 uses the efficient H.264 and H.265 (HEVC) codecs to compress video without significant quality loss, fitting within email size limits.
- ZIP: Compressing videos into ZIP files can significantly reduce their size without quality loss. Ideal for multiple files, the ZIP format helps bypass email limitations while ensuring files are easy to download and extract.
Consider adjusting bitrate, resolution, and video length to manage file size better. Tools like Animotica can help you export videos in MP4 and adjust settings, optimizing your videos for email.
Why do videos sometimes fail to send through e-mail?
Several factors can prevent your video from sending through email successfully:
- File Size Limitations: Exceeding the maximum attachment size (e.g., Gmail: 25MB, Outlook: 20MB).
- File Format Issues: Incompatible formats; MP4 is generally safe.
- Slow Internet Connection: High-resolution videos need more bandwidth, which a weak connection can’t handle.
- Email Attachments Restrictions: Some services block certain attachments for security reasons.
- Recipient’s Email Restrictions: The recipient’s provider might block large files or specific formats.
- Server Timeout: Large files are prone to server timeouts, disrupting uploads.
Understanding these obstacles allows you to compress, convert, or use cloud storage to ensure smooth video sharing.


32 Comments
Your perspective on this topic is very interesting. Thanks for the detailed explanation.
**aquasculpt**
aquasculpt is a premium fat-burning supplement meticulously formulated to accelerate your metabolism and increase your energy output.
**backbiome**
backbiome is a naturally crafted, research-backed daily supplement formulated to gently relieve back tension and soothe sciatic discomfort.
**boostaro**
boostaro is a specially crafted dietary supplement for men who want to elevate their overall health and vitality.
**vivalis**
vivalis is a premium natural formula created to help men feel stronger, more energetic, and more confident every day.
Your writing style makes complex topics seem simple. Thanks!
**glycomute**
glycomute is a natural nutritional formula carefully created to nurture healthy blood sugar levels and support overall metabolic performance.
**balmorex pro**
balmorex is an exceptional solution for individuals who suffer from chronic joint pain and muscle aches.
**aquasculpt**
aquasculpt is a revolutionary supplement crafted to aid weight management by naturally accelerating metabolism
**alpha boost**
alpha boost for men, feeling strong, energized, and confident is closely tied to overall quality of life. However, with age, stress, and daily demands
**prostavive**
prostavive Maintaining prostate health is crucial for mens overall wellness, especially as they grow older.
**nervecalm**
nervecalm is a high-quality nutritional supplement crafted to promote nerve wellness, ease chronic discomfort, and boost everyday vitality.
**hepato burn**
hepatoburn is a high-quality, plant-forward dietary blend created to nourish liver function, encourage a healthy metabolic rhythm, and support the bodys natural fat-processing pathways.
**synadentix**
synadentix is a dental health supplement created to nourish and protect your teeth and gums with a targeted combination of natural ingredients
**yu sleep**
yusleep is a gentle, nano-enhanced nightly blend designed to help you drift off quickly, stay asleep longer, and wake feeling clear
**prodentim**
prodentim is a distinctive oral-care formula that pairs targeted probiotics with plant-based ingredients to encourage strong teeth
**nitric boost**
nitric boost is a daily wellness blend formulated to elevate vitality and support overall performance.
**gl pro**
glpro is a natural dietary supplement designed to promote balanced blood sugar levels and curb sugar cravings.
**mindvault**
mindvault is a premium cognitive support formula created for adults 45+.
**vitrafoxin**
vitrafoxin is a premium brain enhancement formula crafted with natural ingredients to promote clear thinking, memory retention, and long-lasting mental energy.
**vertiaid**
vertiaid is a high-quality, natural formula created to support stable balance, enhance mental sharpness, and alleviate feelings of dizziness
**femipro**
femipro is a dietary supplement developed as a natural remedy for women facing bladder control issues and seeking to improve their urinary health.
**glucore**
glucore is a nutritional supplement that is given to patients daily to assist in maintaining healthy blood sugar and metabolic rates.
**sugarmute**
sugarmute is a science-guided nutritional supplement created to help maintain balanced blood sugar while supporting steady energy and mental clarity
**prime biome**
The natural cycle of skin cell renewal plays a vital role in maintaining a healthy and youthful appearance by shedding old cells and generating new ones.
**tonic greens**
tonic greens is a cutting-edge health blend made with a rich fusion of natural botanicals and superfoods, formulated to boost immune resilience and promote daily vitality.
**gluco6**
gluco6 is a natural, plant-based supplement designed to help maintain healthy blood sugar levels.
**oradentum**
oradentum is a comprehensive 21-in-1 oral care formula designed to reinforce enamel, support gum vitality, and neutralize bad breath using a fusion of nature-derived, scientifically validated compounds.
**biodentex**
biodentex is a dentist-endorsed oral wellness blend crafted to help fortify gums, defend enamel, and keep your breath consistently fresh.
**sleep lean**
is a US-trusted, naturally focused nighttime support formula that helps your body burn fat while you rest.
**finessa**
Finessa is a natural supplement made to support healthy digestion, improve metabolism, and help you achieve a flatter belly.
Today, I went to the beach with my children. I found a sea shell and gave it to my 4 year old daughter and
said “You can hear the ocean if you put this to your ear.” She placed the shell to her ear and screamed.
There was a hermit crab inside and it pinched her ear. She never wants to go back!
LoL I know this is entirely off topic but I had to tell someone!